¶ B-Capture User Guide

Setting Up
1. Open the application and put in your desired location to save recordings.
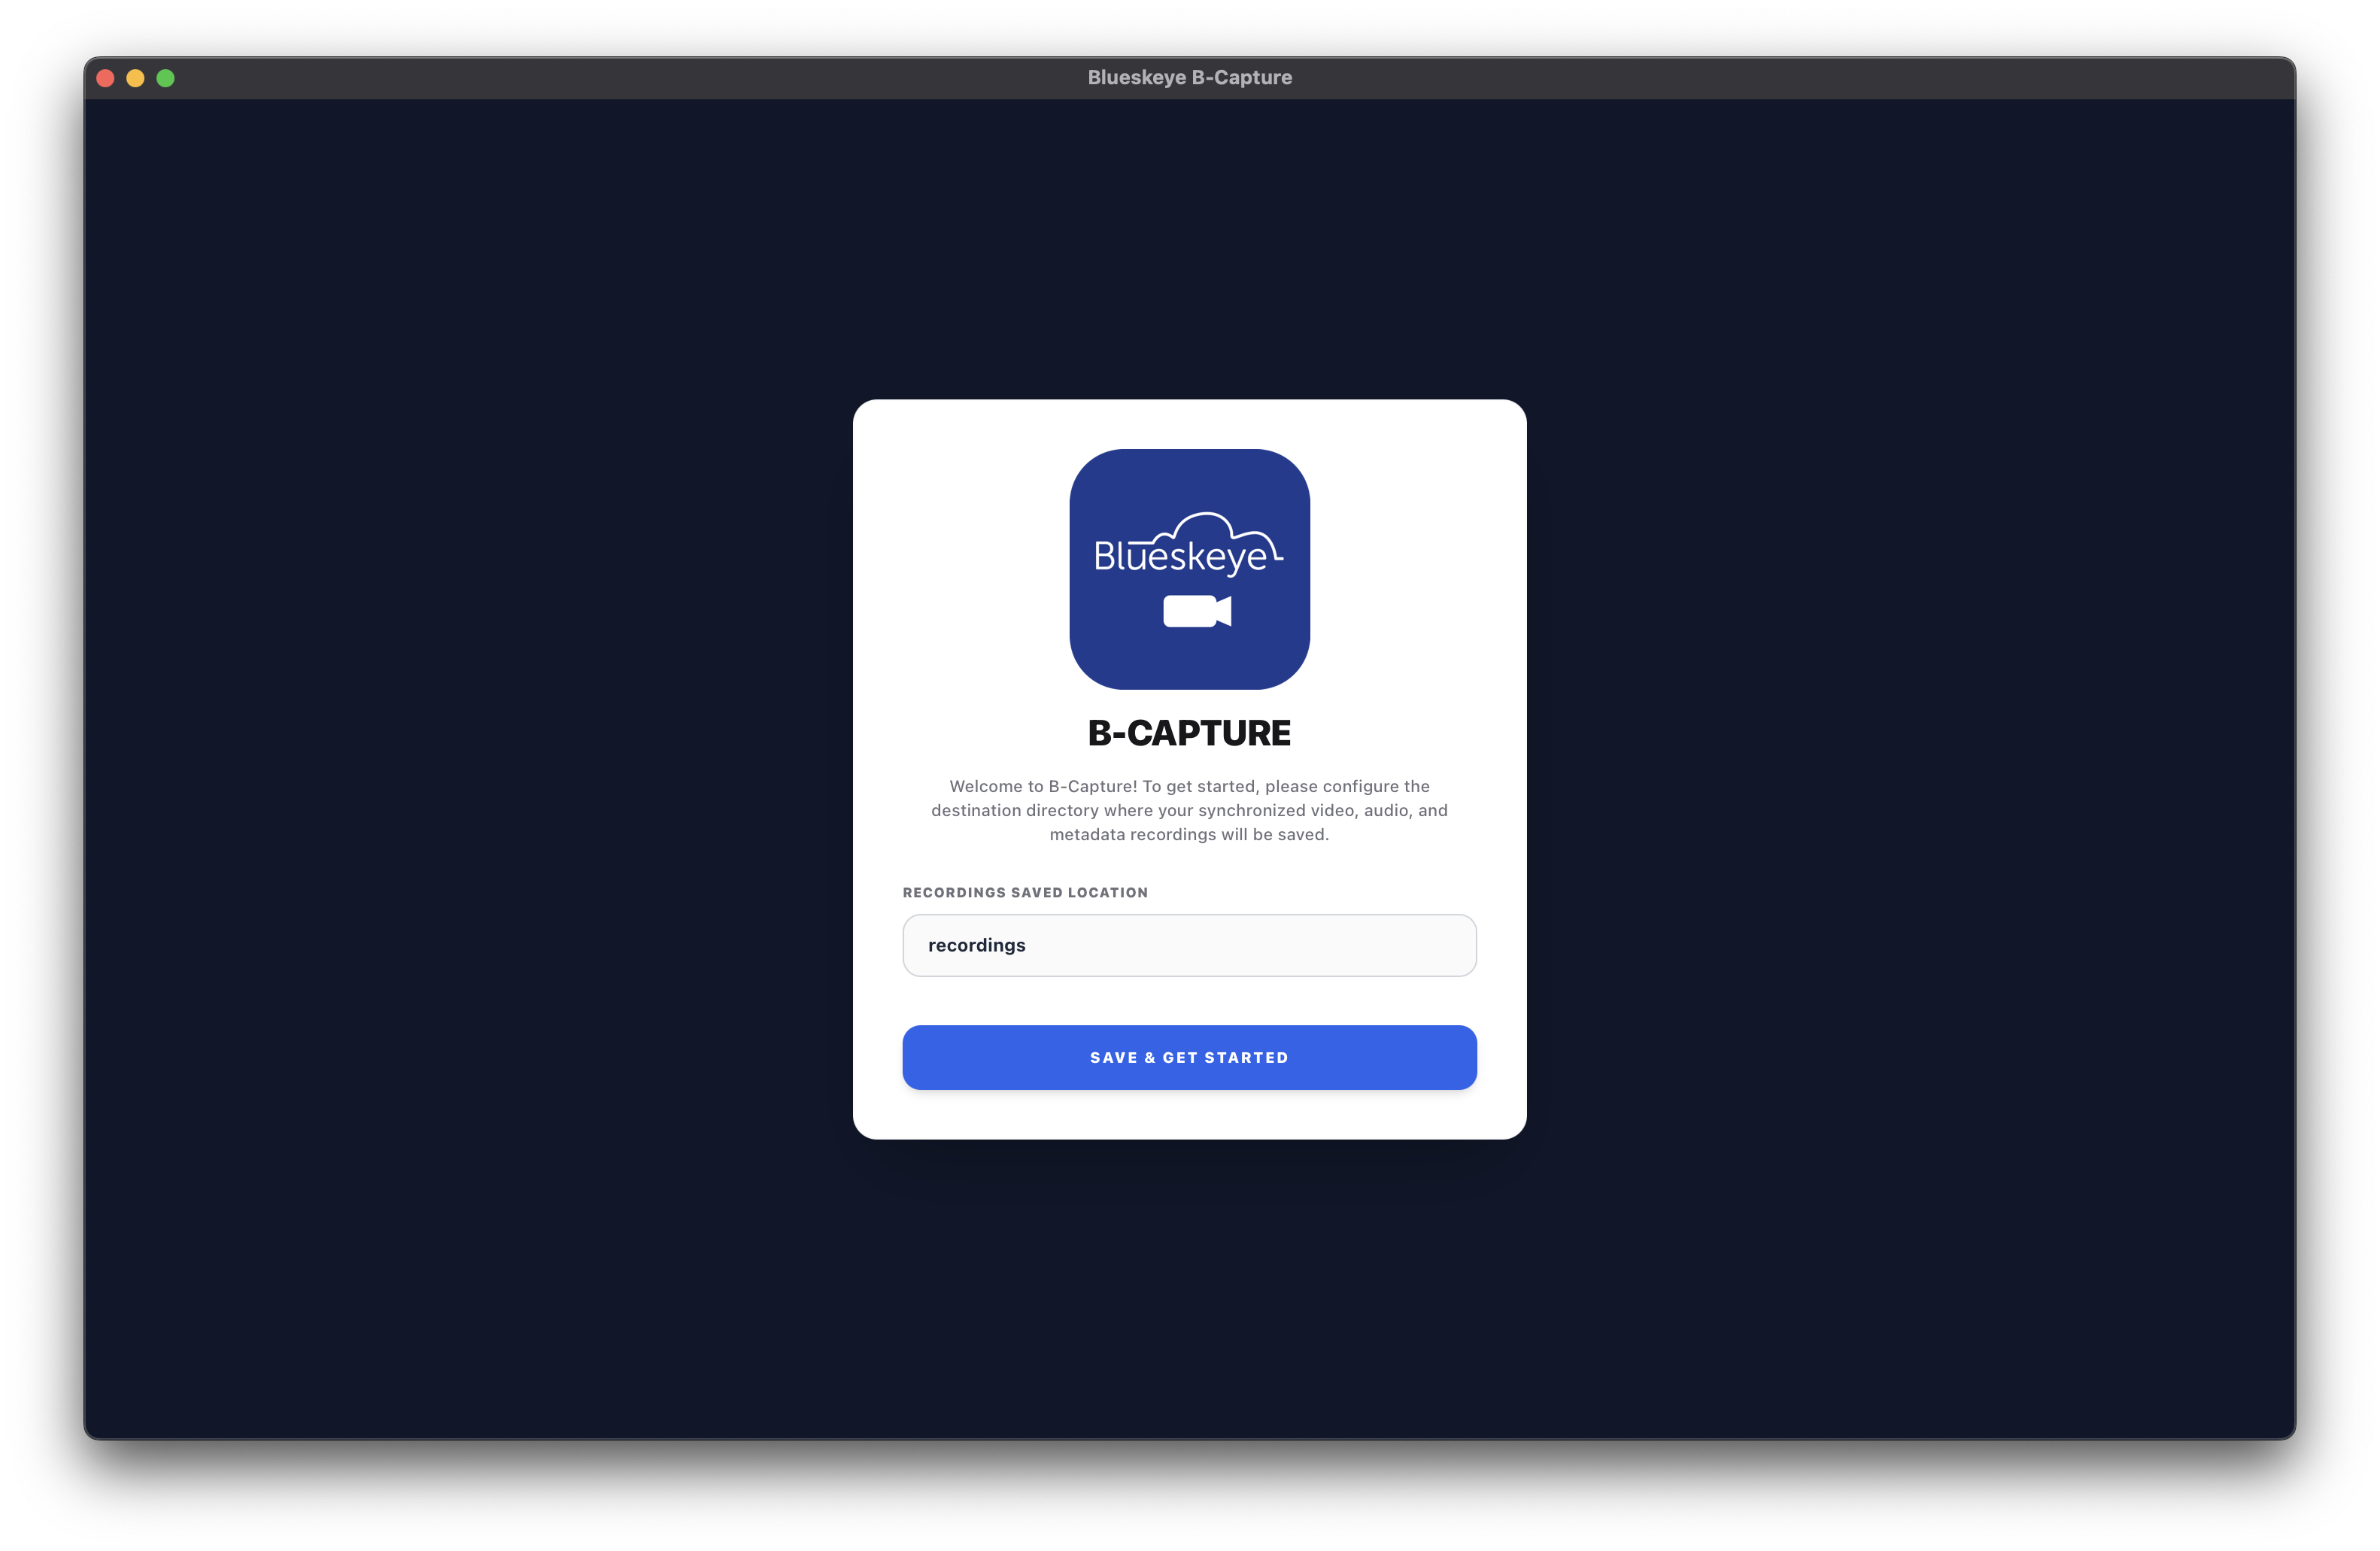
2. Click on "Save & Get Started" to proceed.
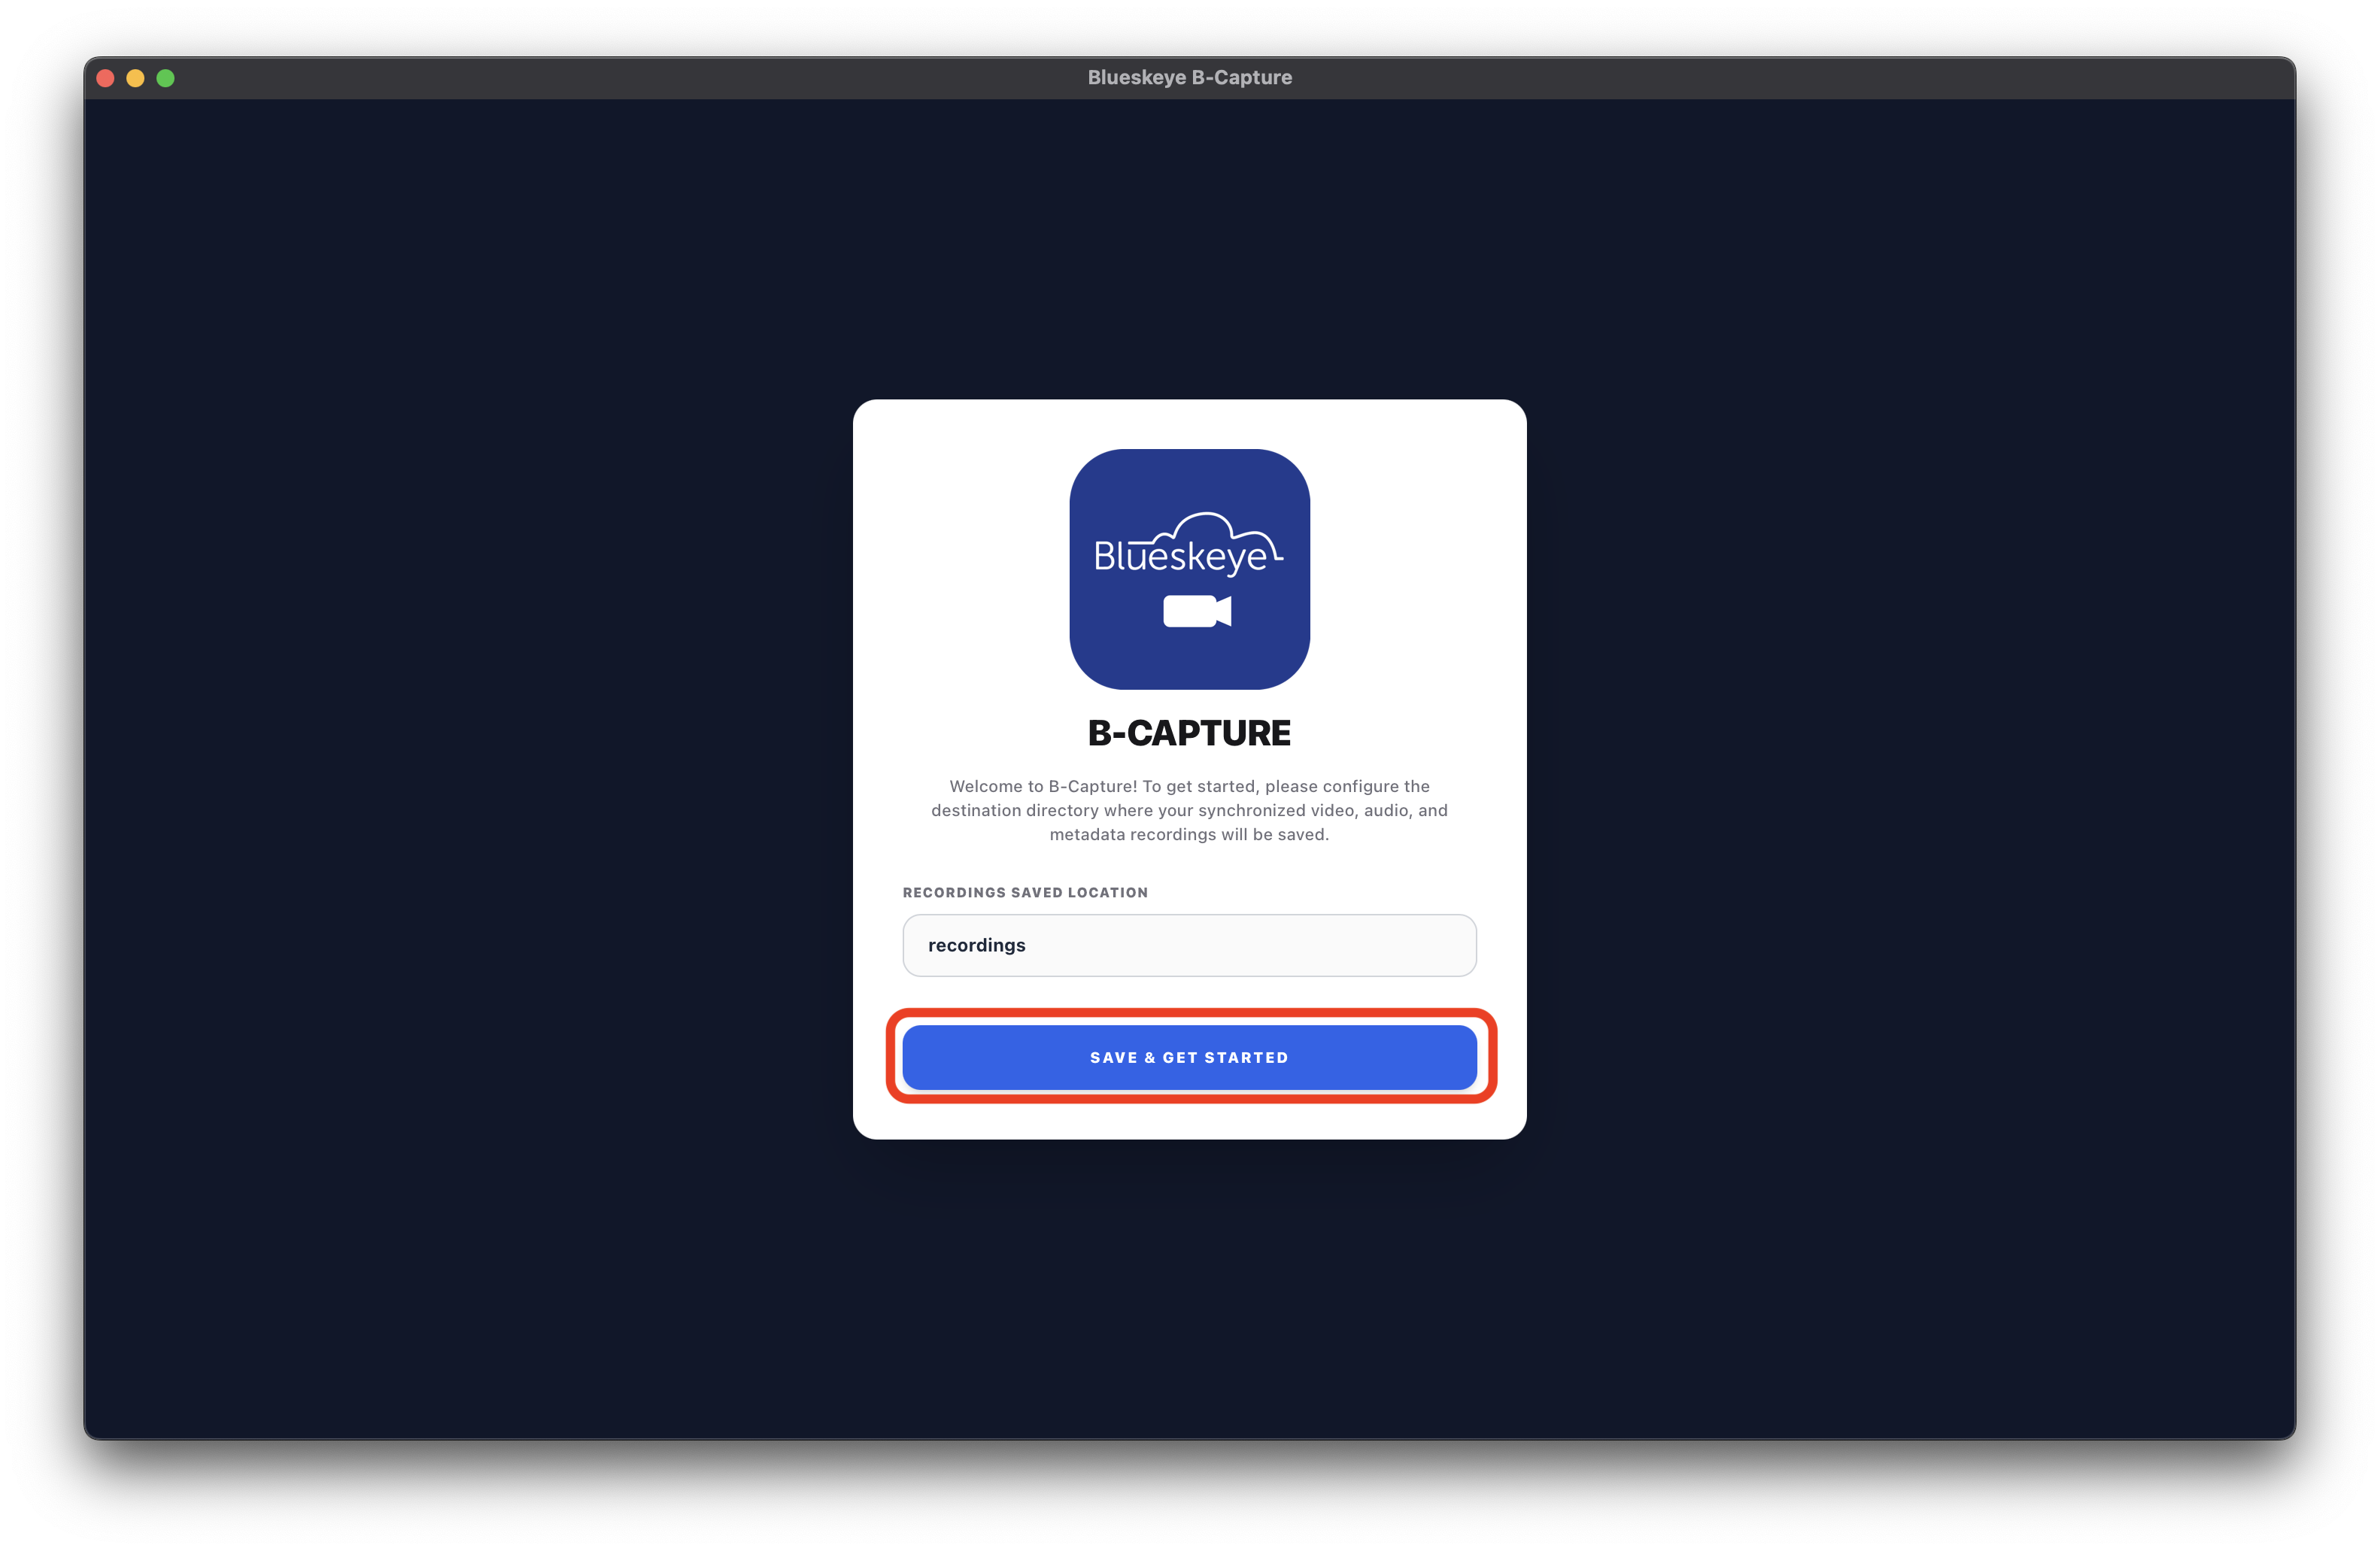
3. Read through the guide and follow the instructions provided.
Once every step of the guide has been completed, click on "I've Granted It".

Features
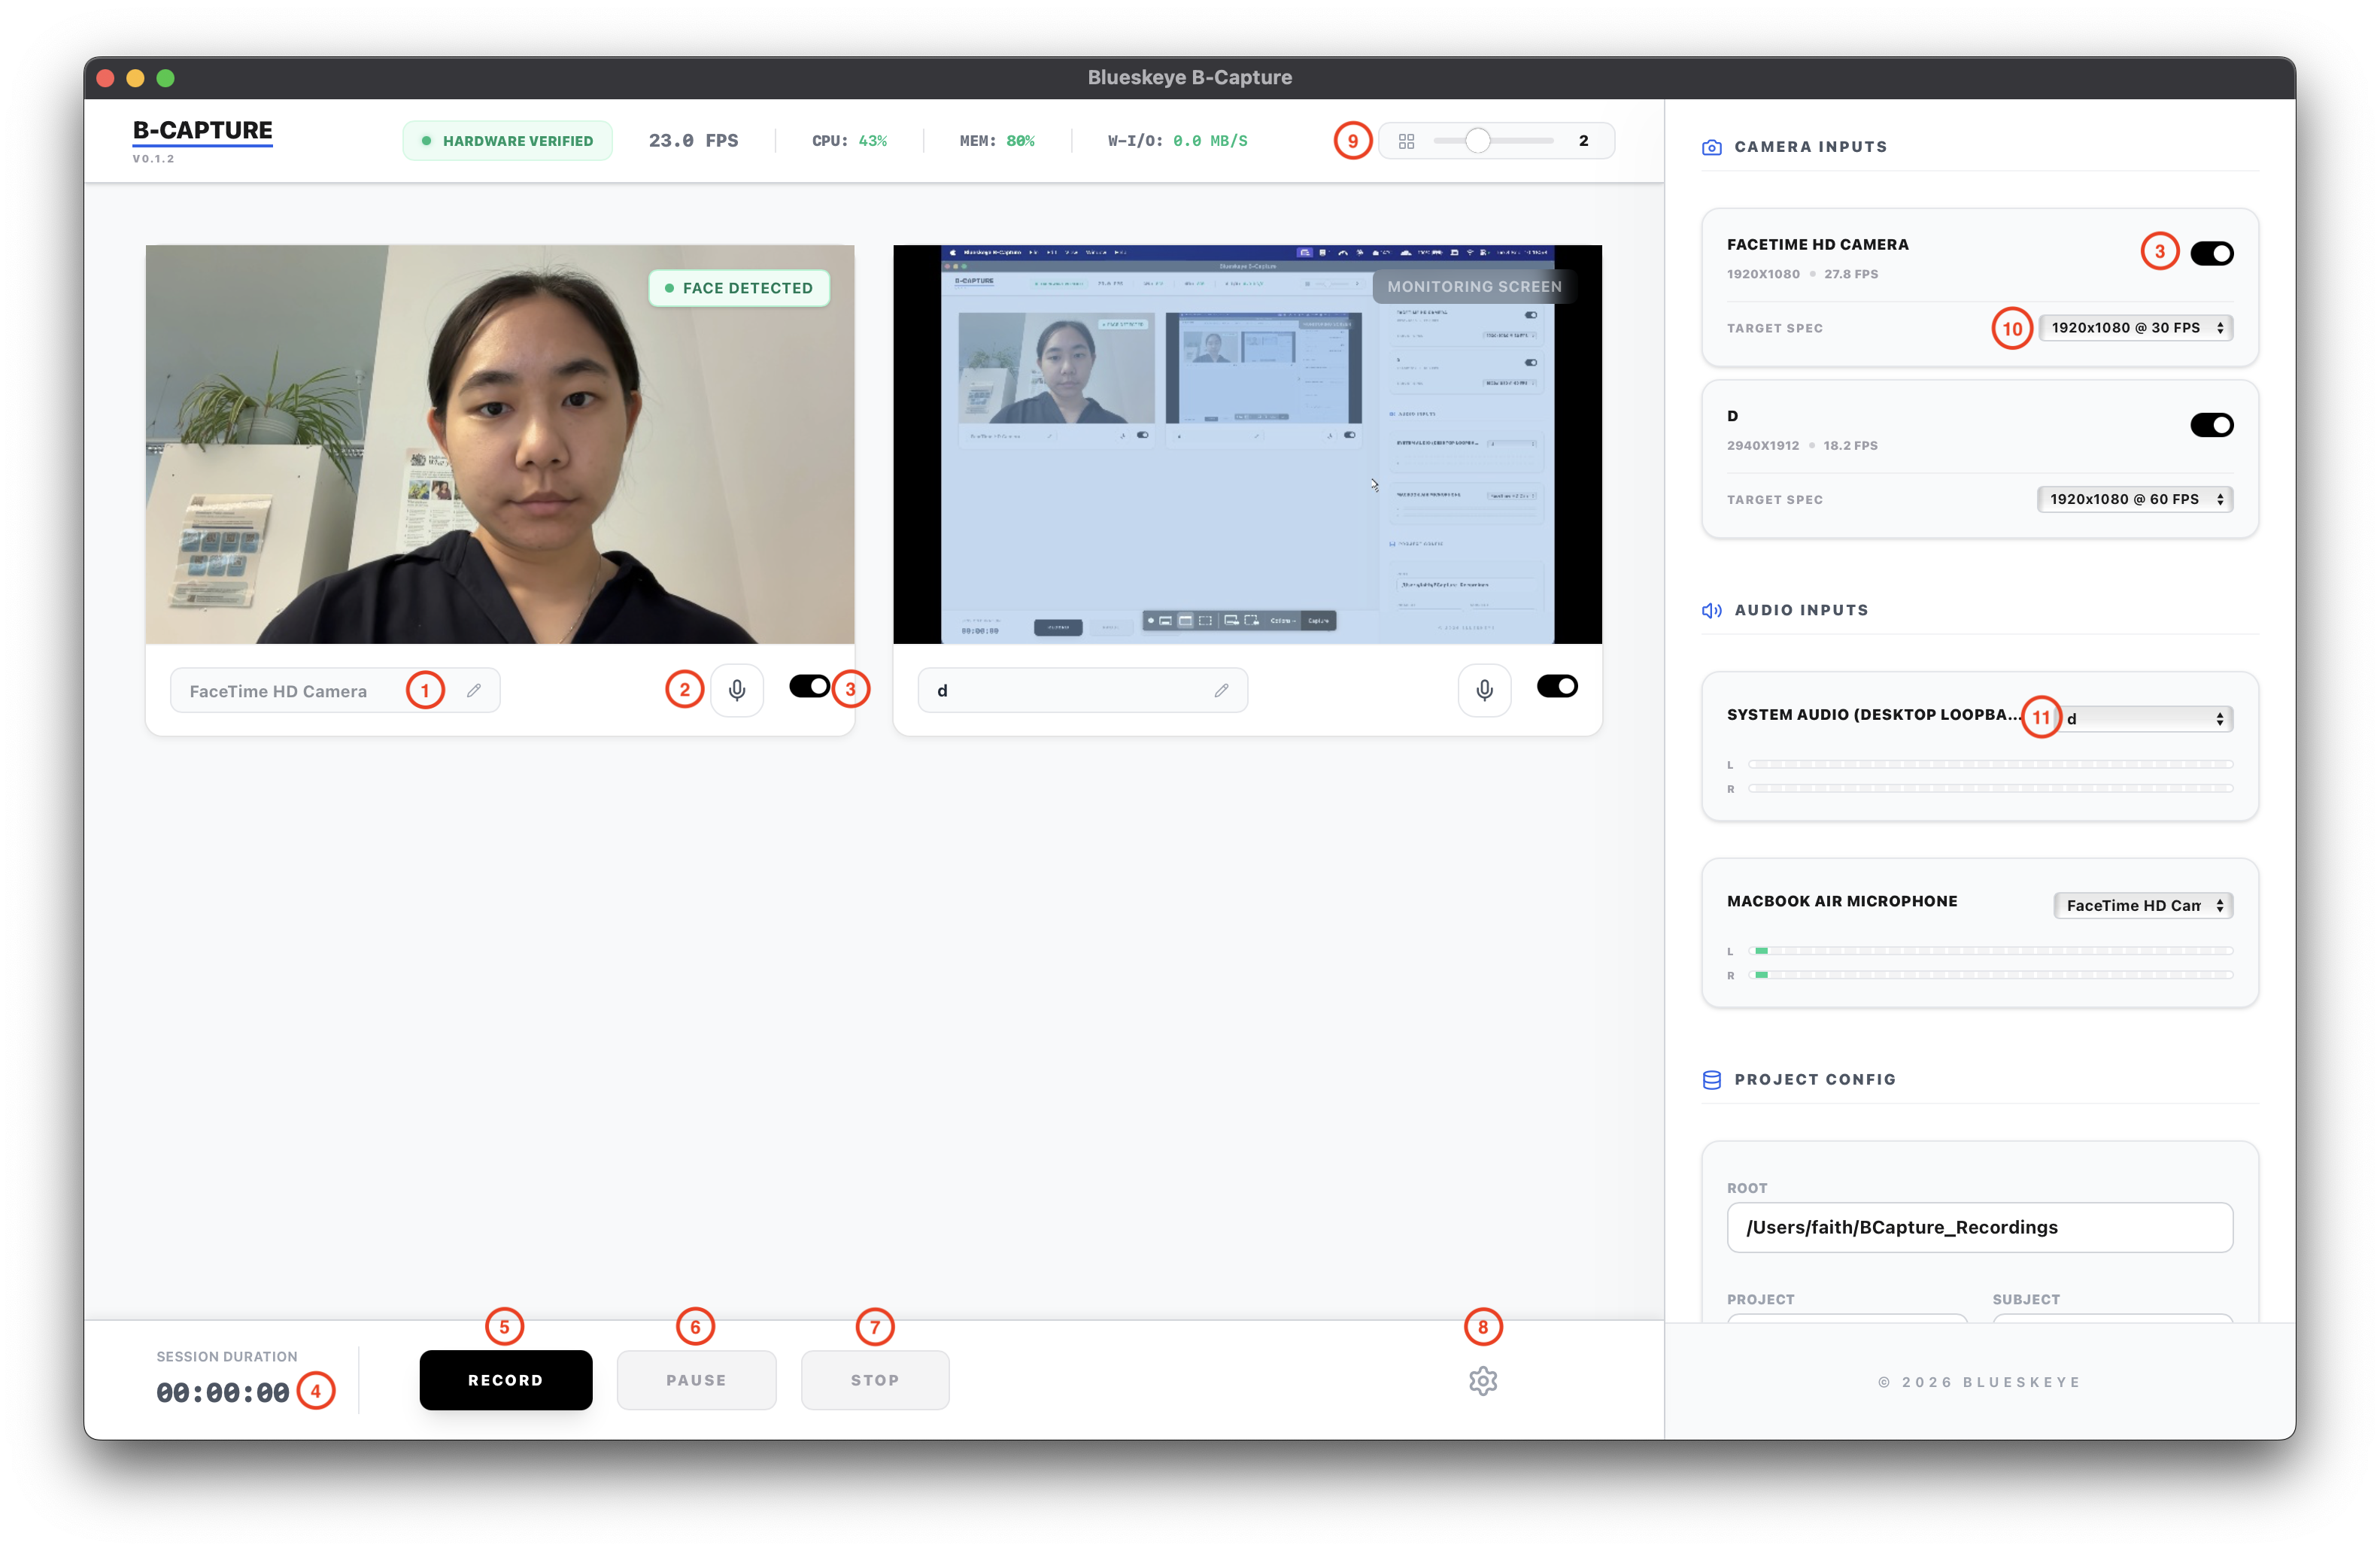
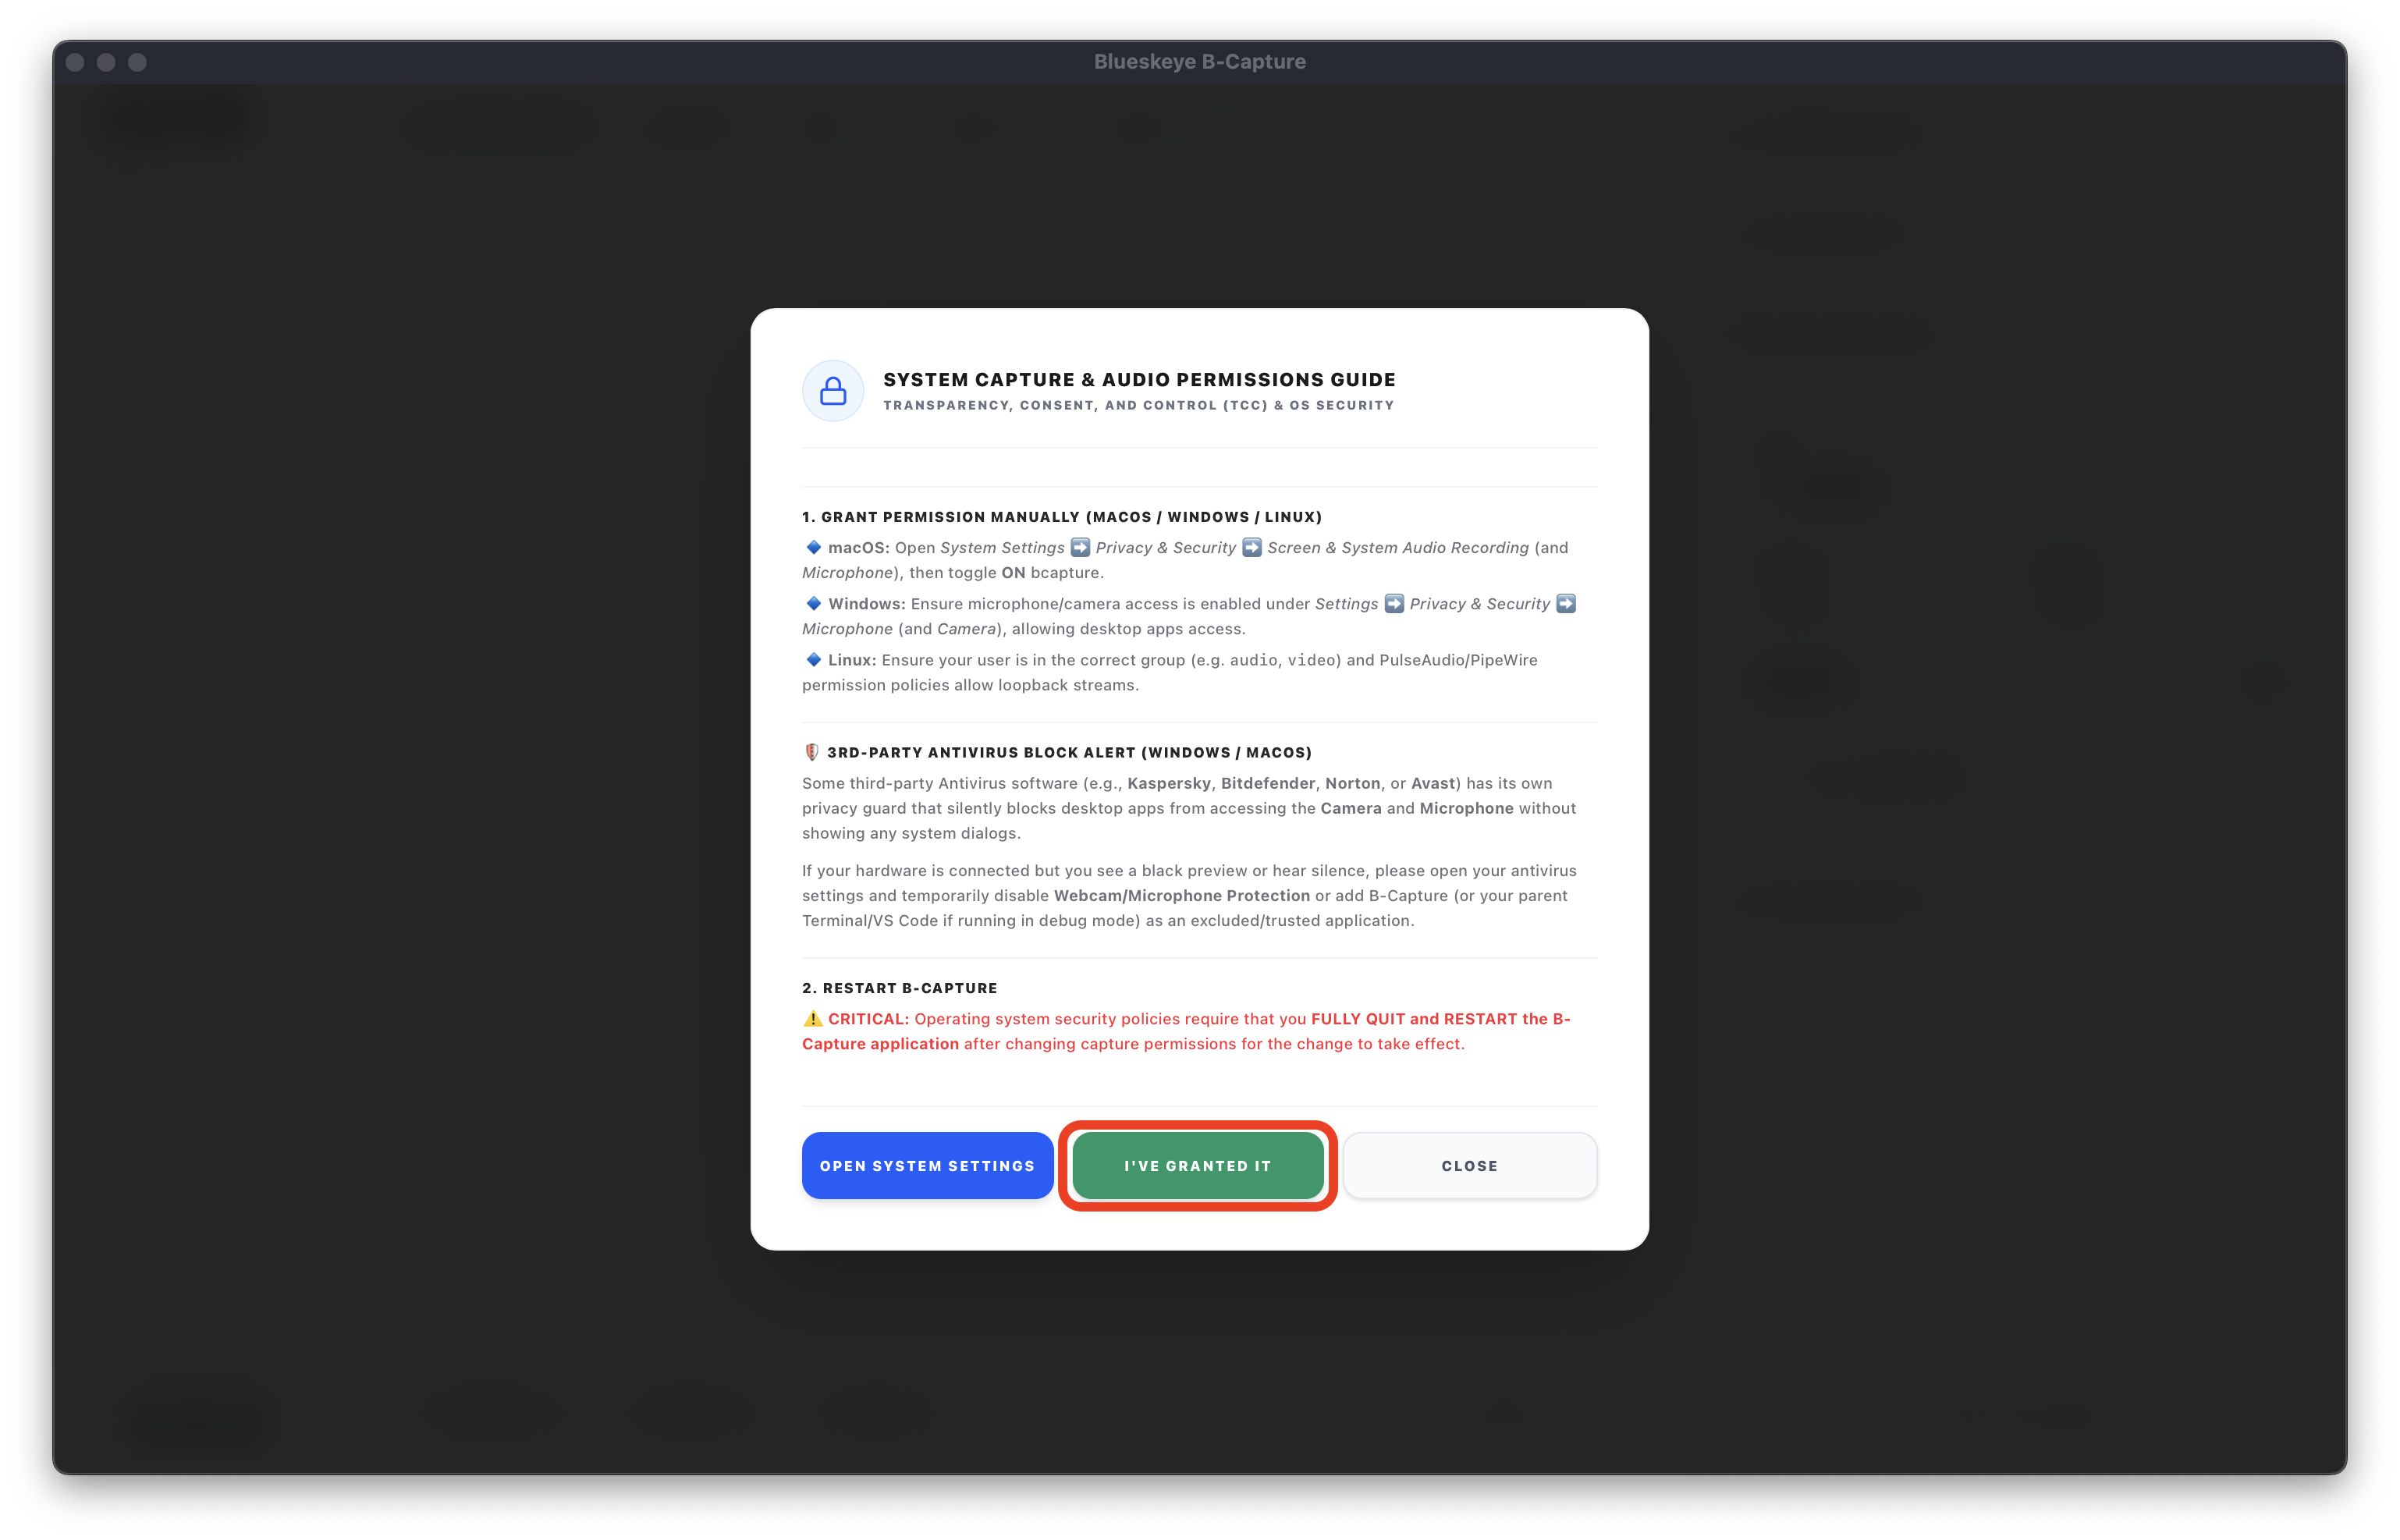
- Camera name display + edit
- Video mute button
- Video toggle — disabling this toggle removes the associated video from the recording.
- Session duration stopwatch
- Record button
- Pause button
- Stop button
- Settings button
- Display grid slider — adjust the amount of camera feeds displayed in each row.
- Target video recording resolution and frames-per-second (FPS)
- Manual assignment of audio input to video
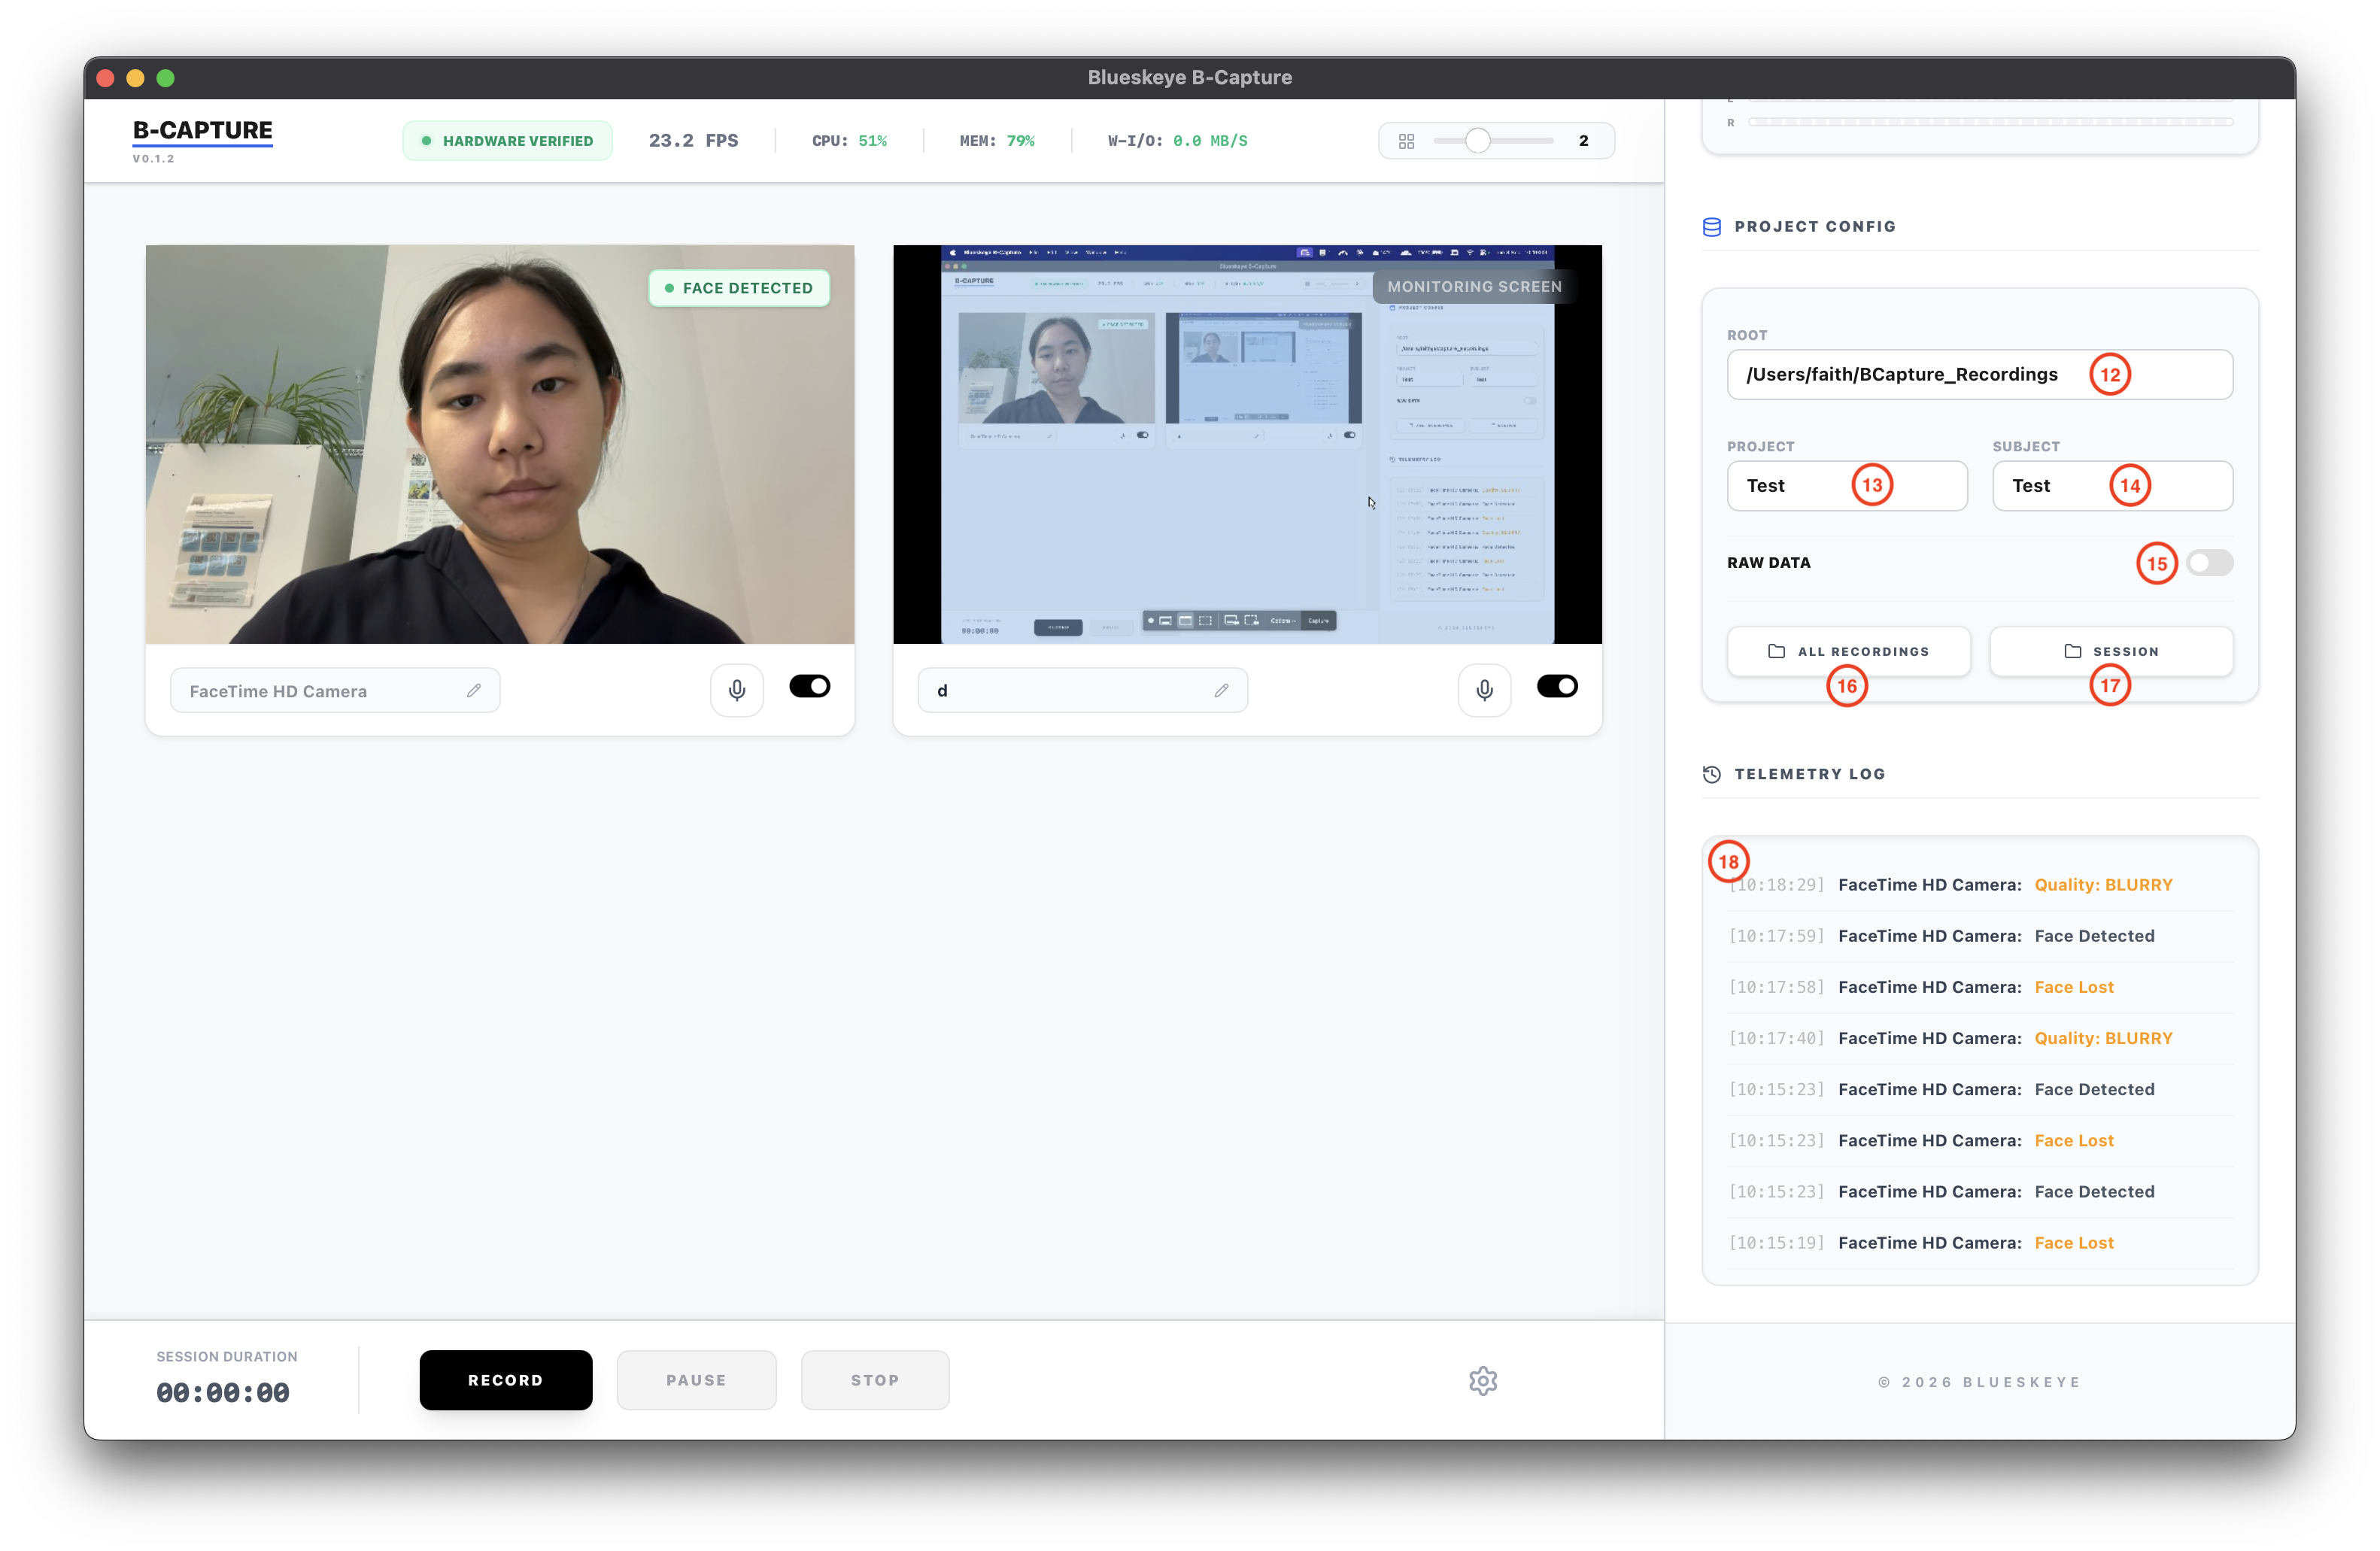
- Root save location field
- Project name field — type in the project name here.
- Subject name field — type in the subject name of the next recording save folder.
- Raw data toggle — records the video in .raw format.
- All Recordings button — opens the root folder where all recordings are saved to.
- Session button — opens the folder where the latest recorded session is saved to.
- Telemetry log — displays all logs generated by the software.

Record A Video
-
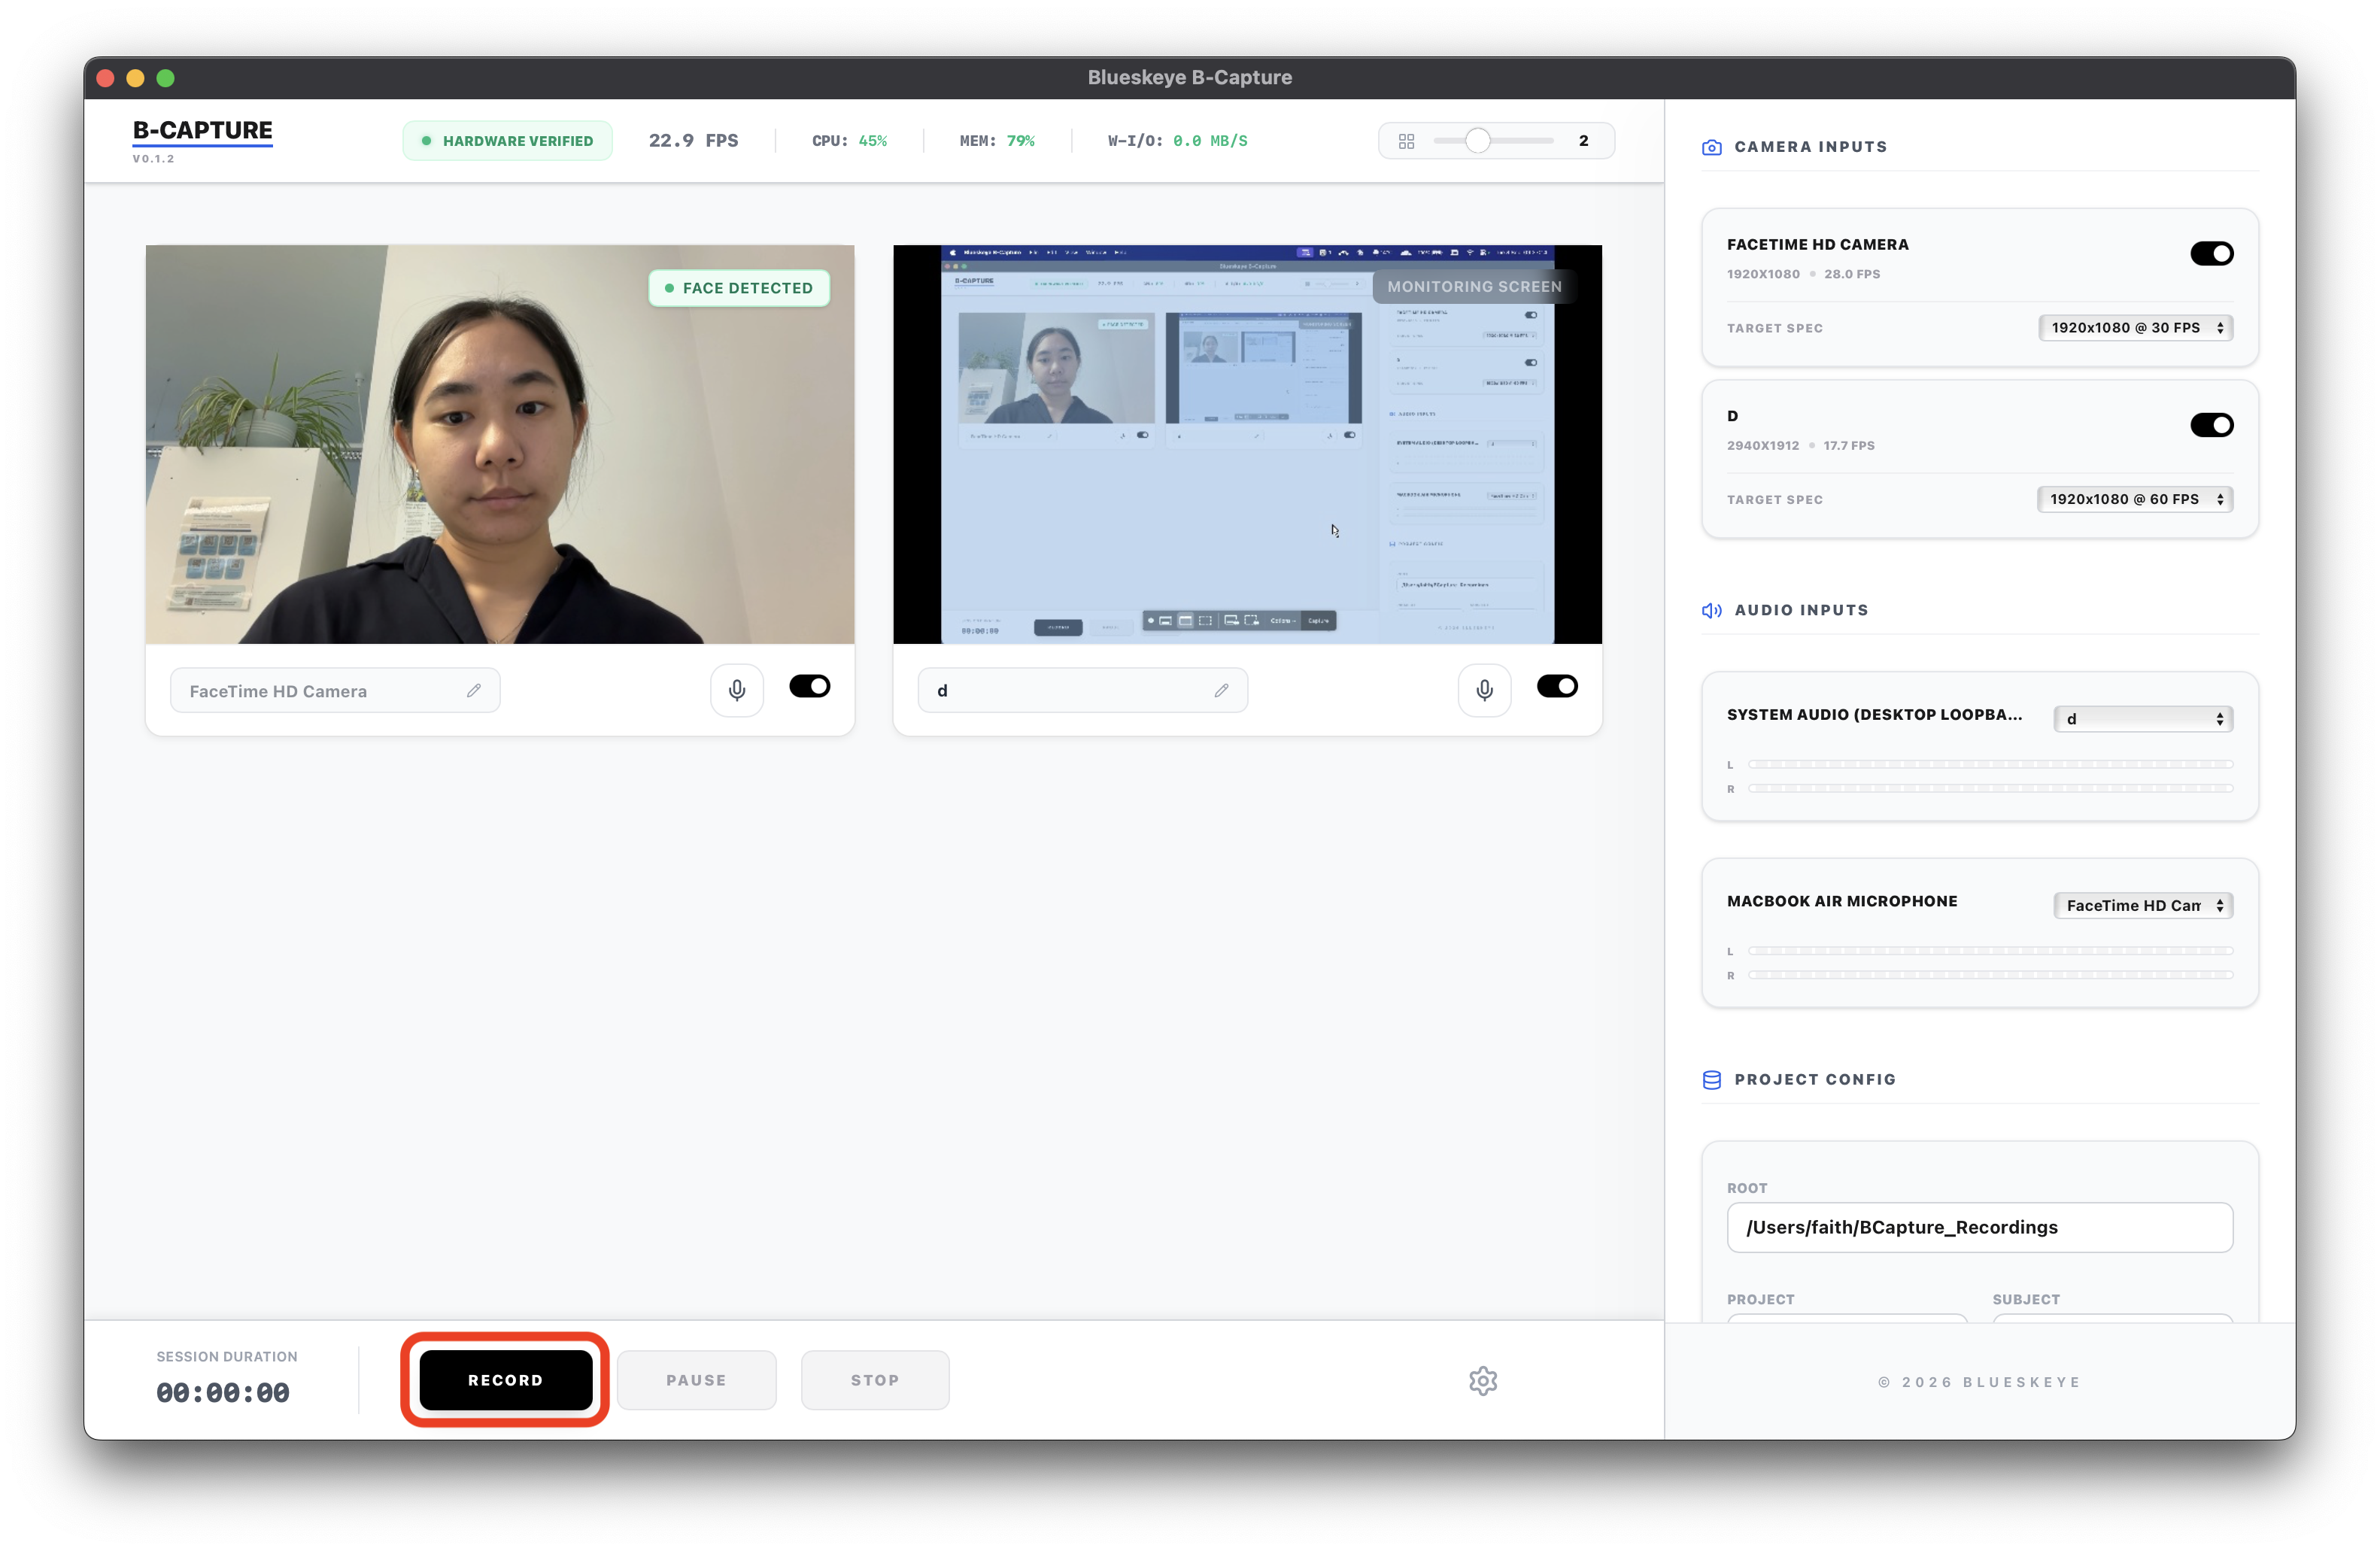
Click on "Record".
-
The recording session begins. No settings can be changed at this stage.
-
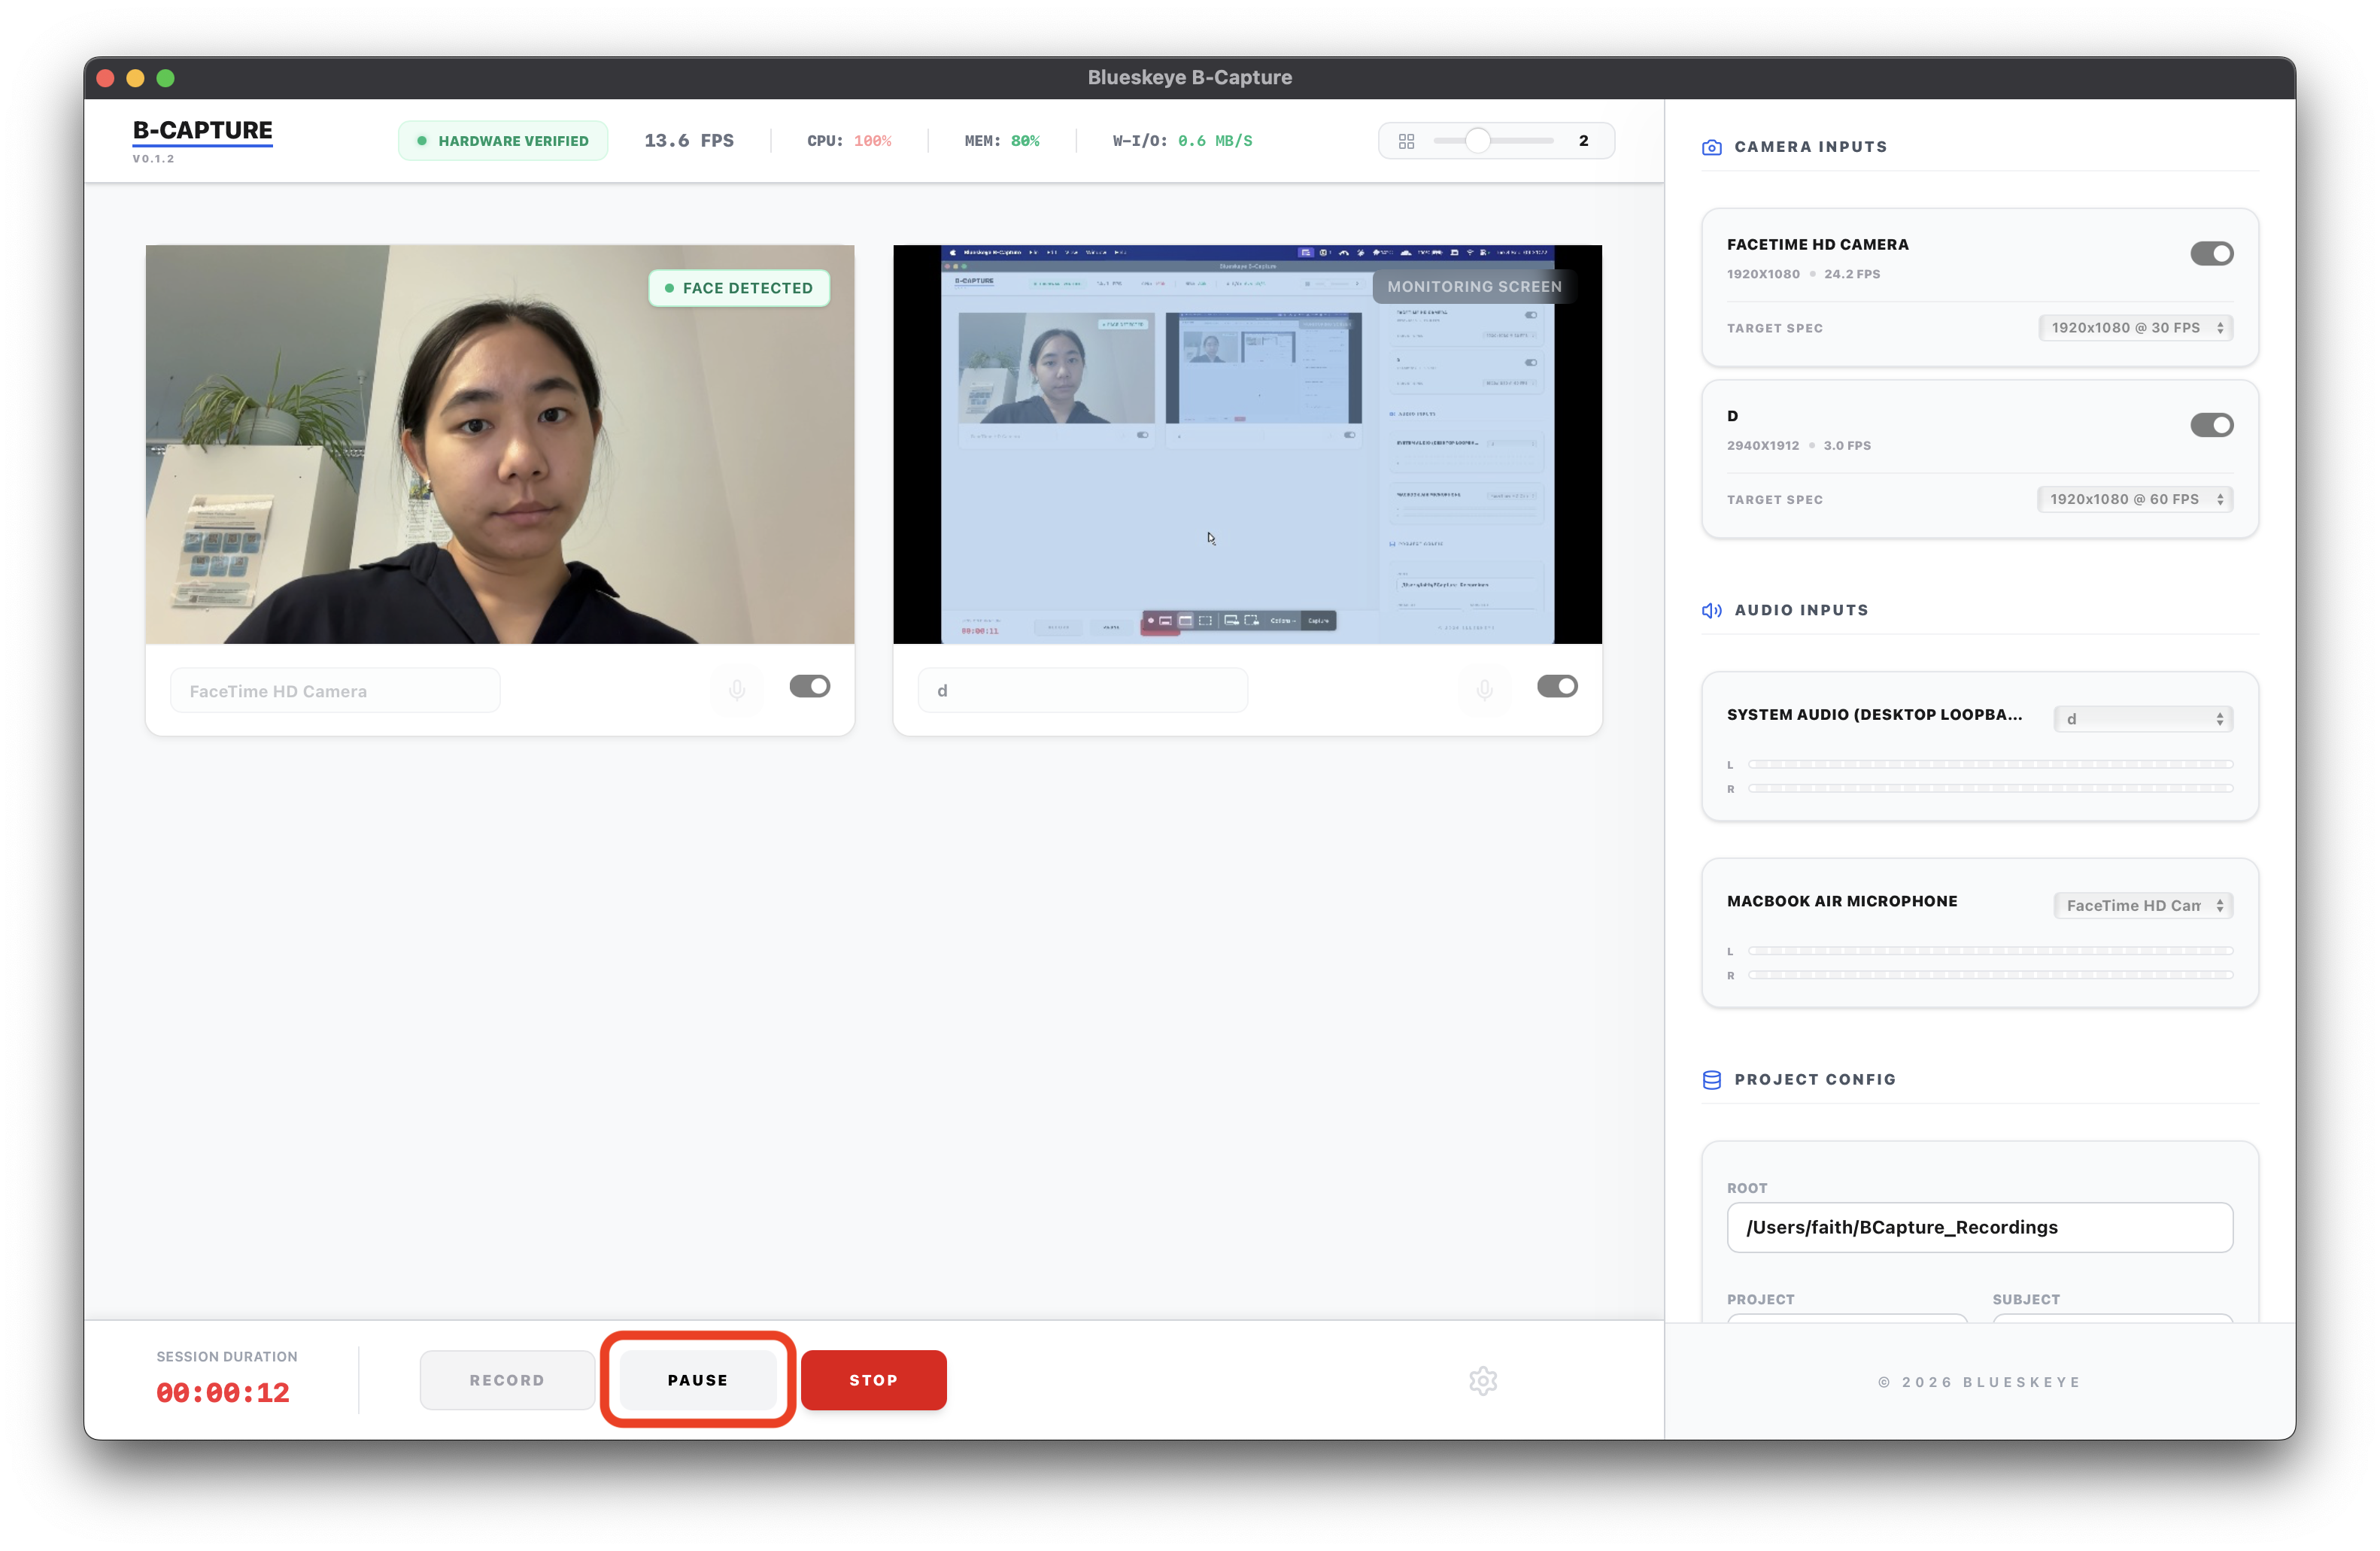
Click on "Pause" to pause the recording.
-
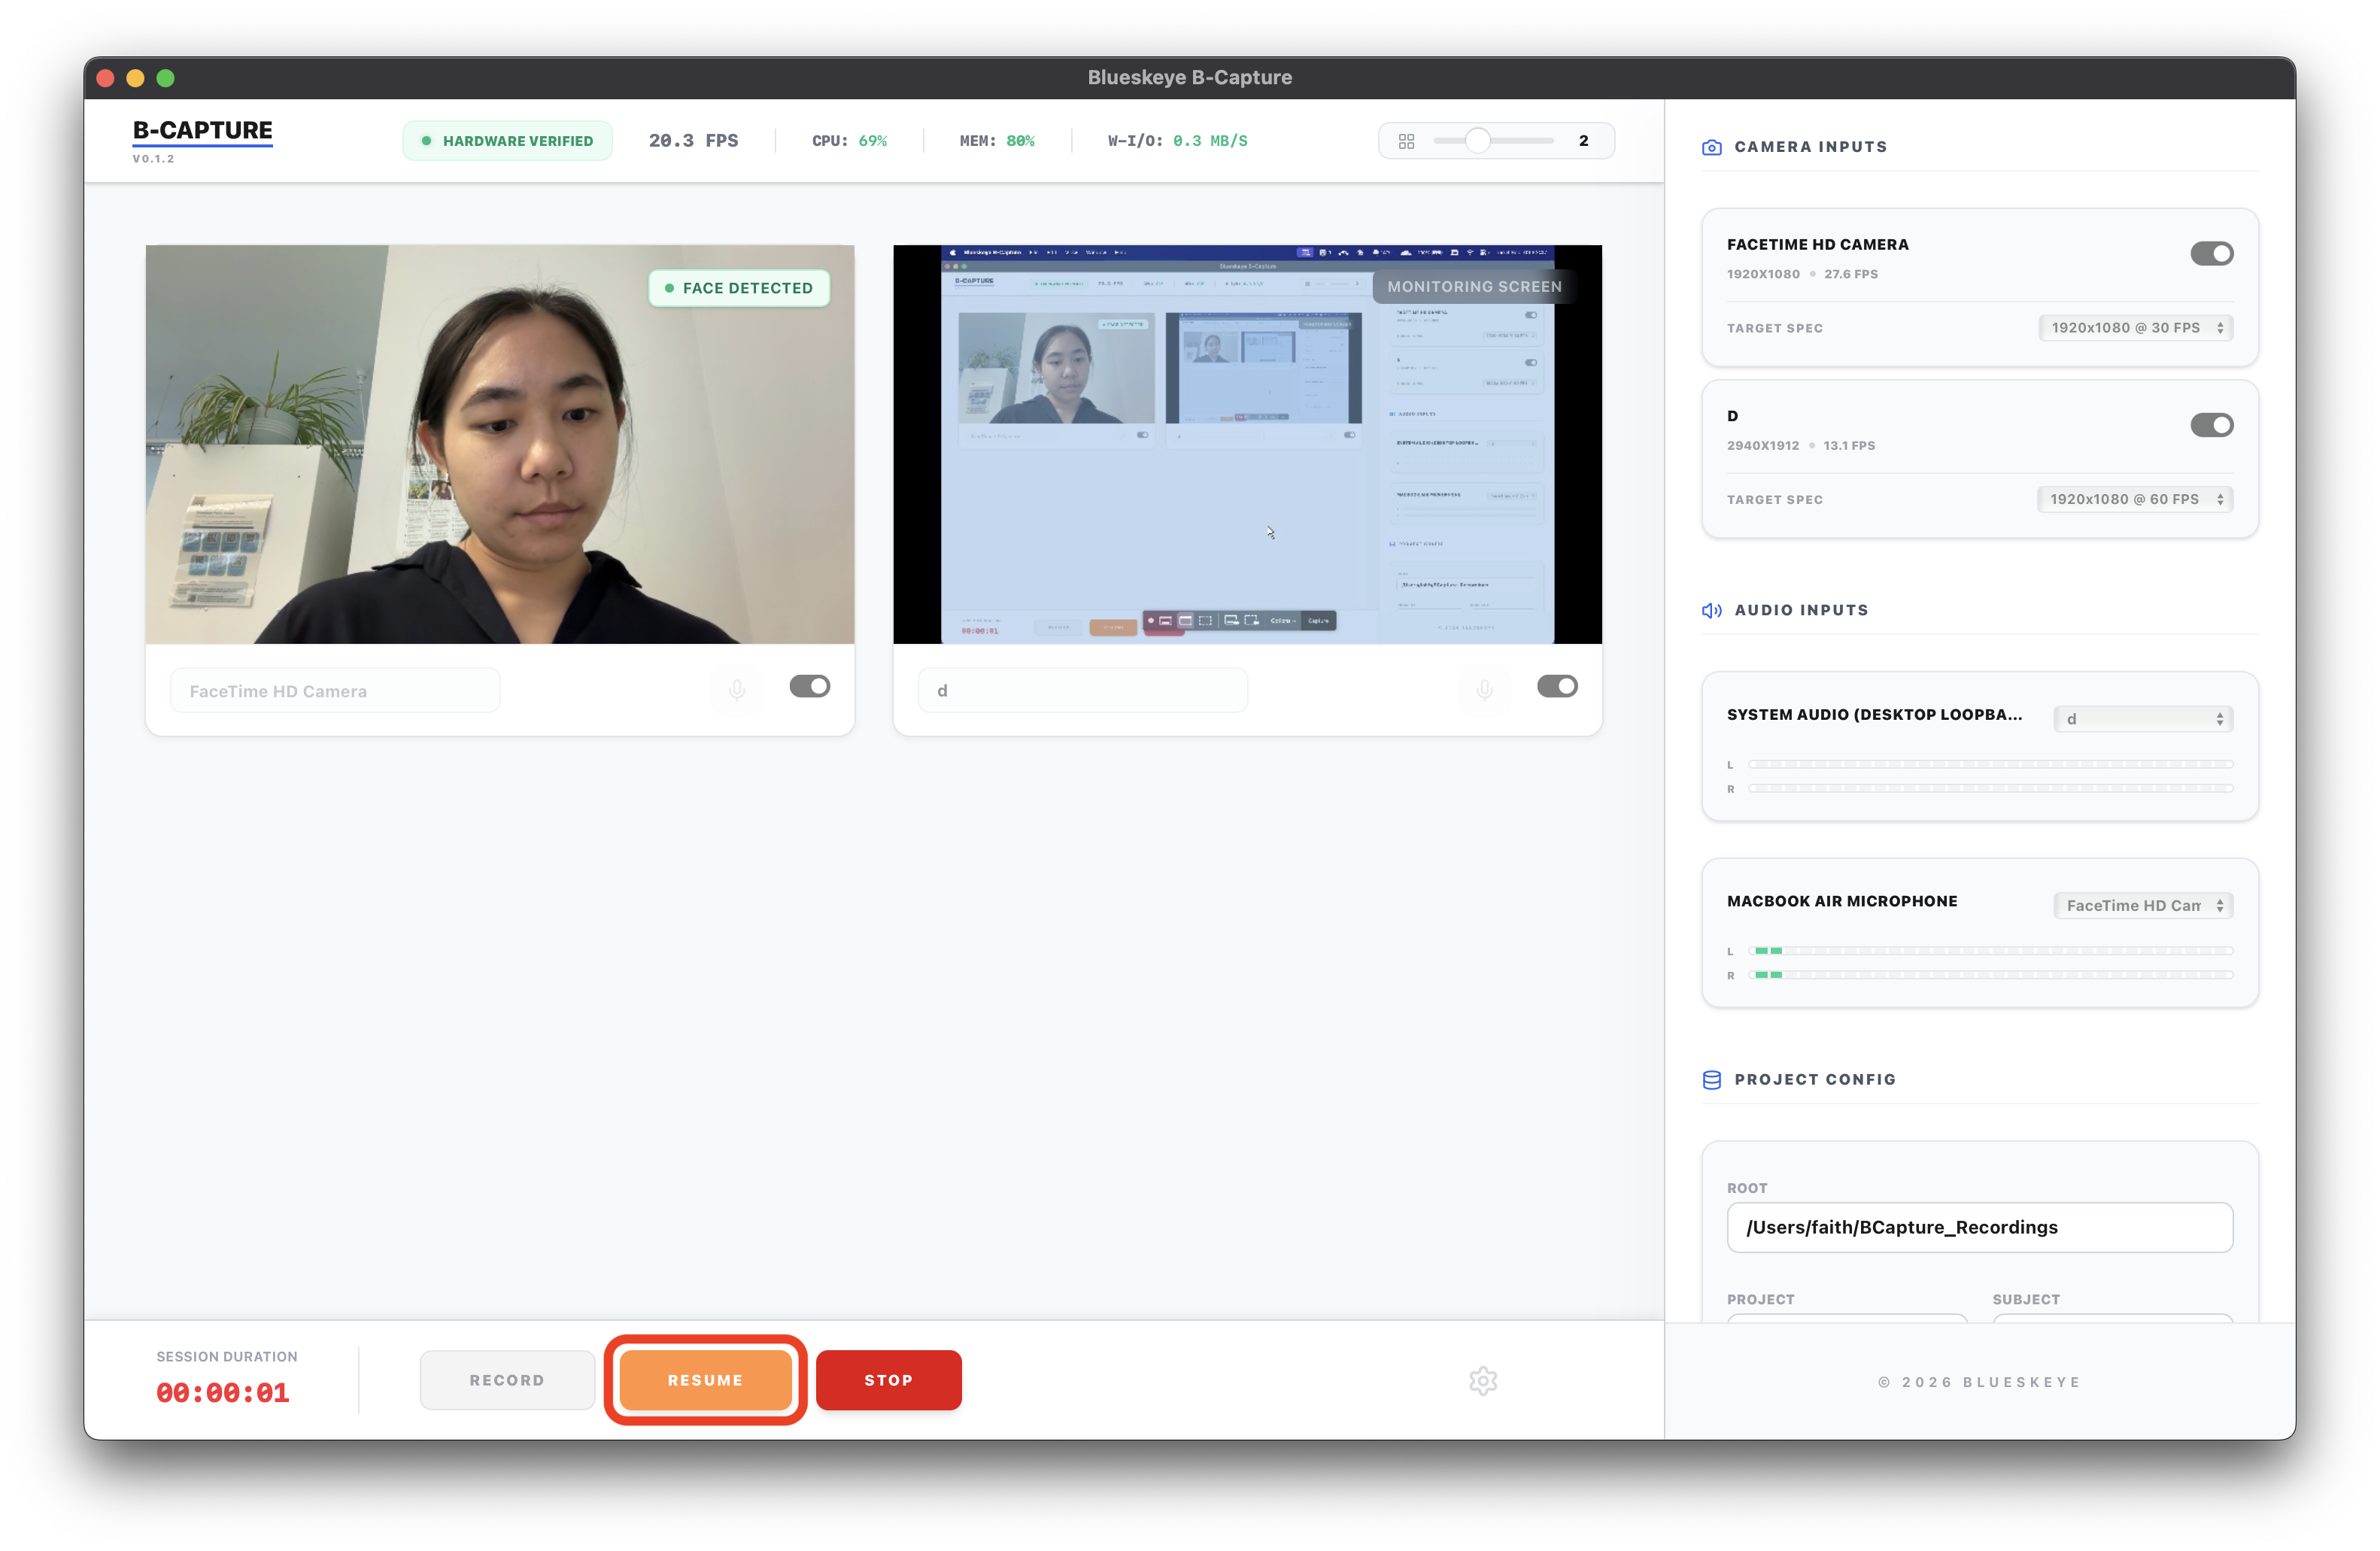
When recording is paused, click on "Resume" to continue recording.
-
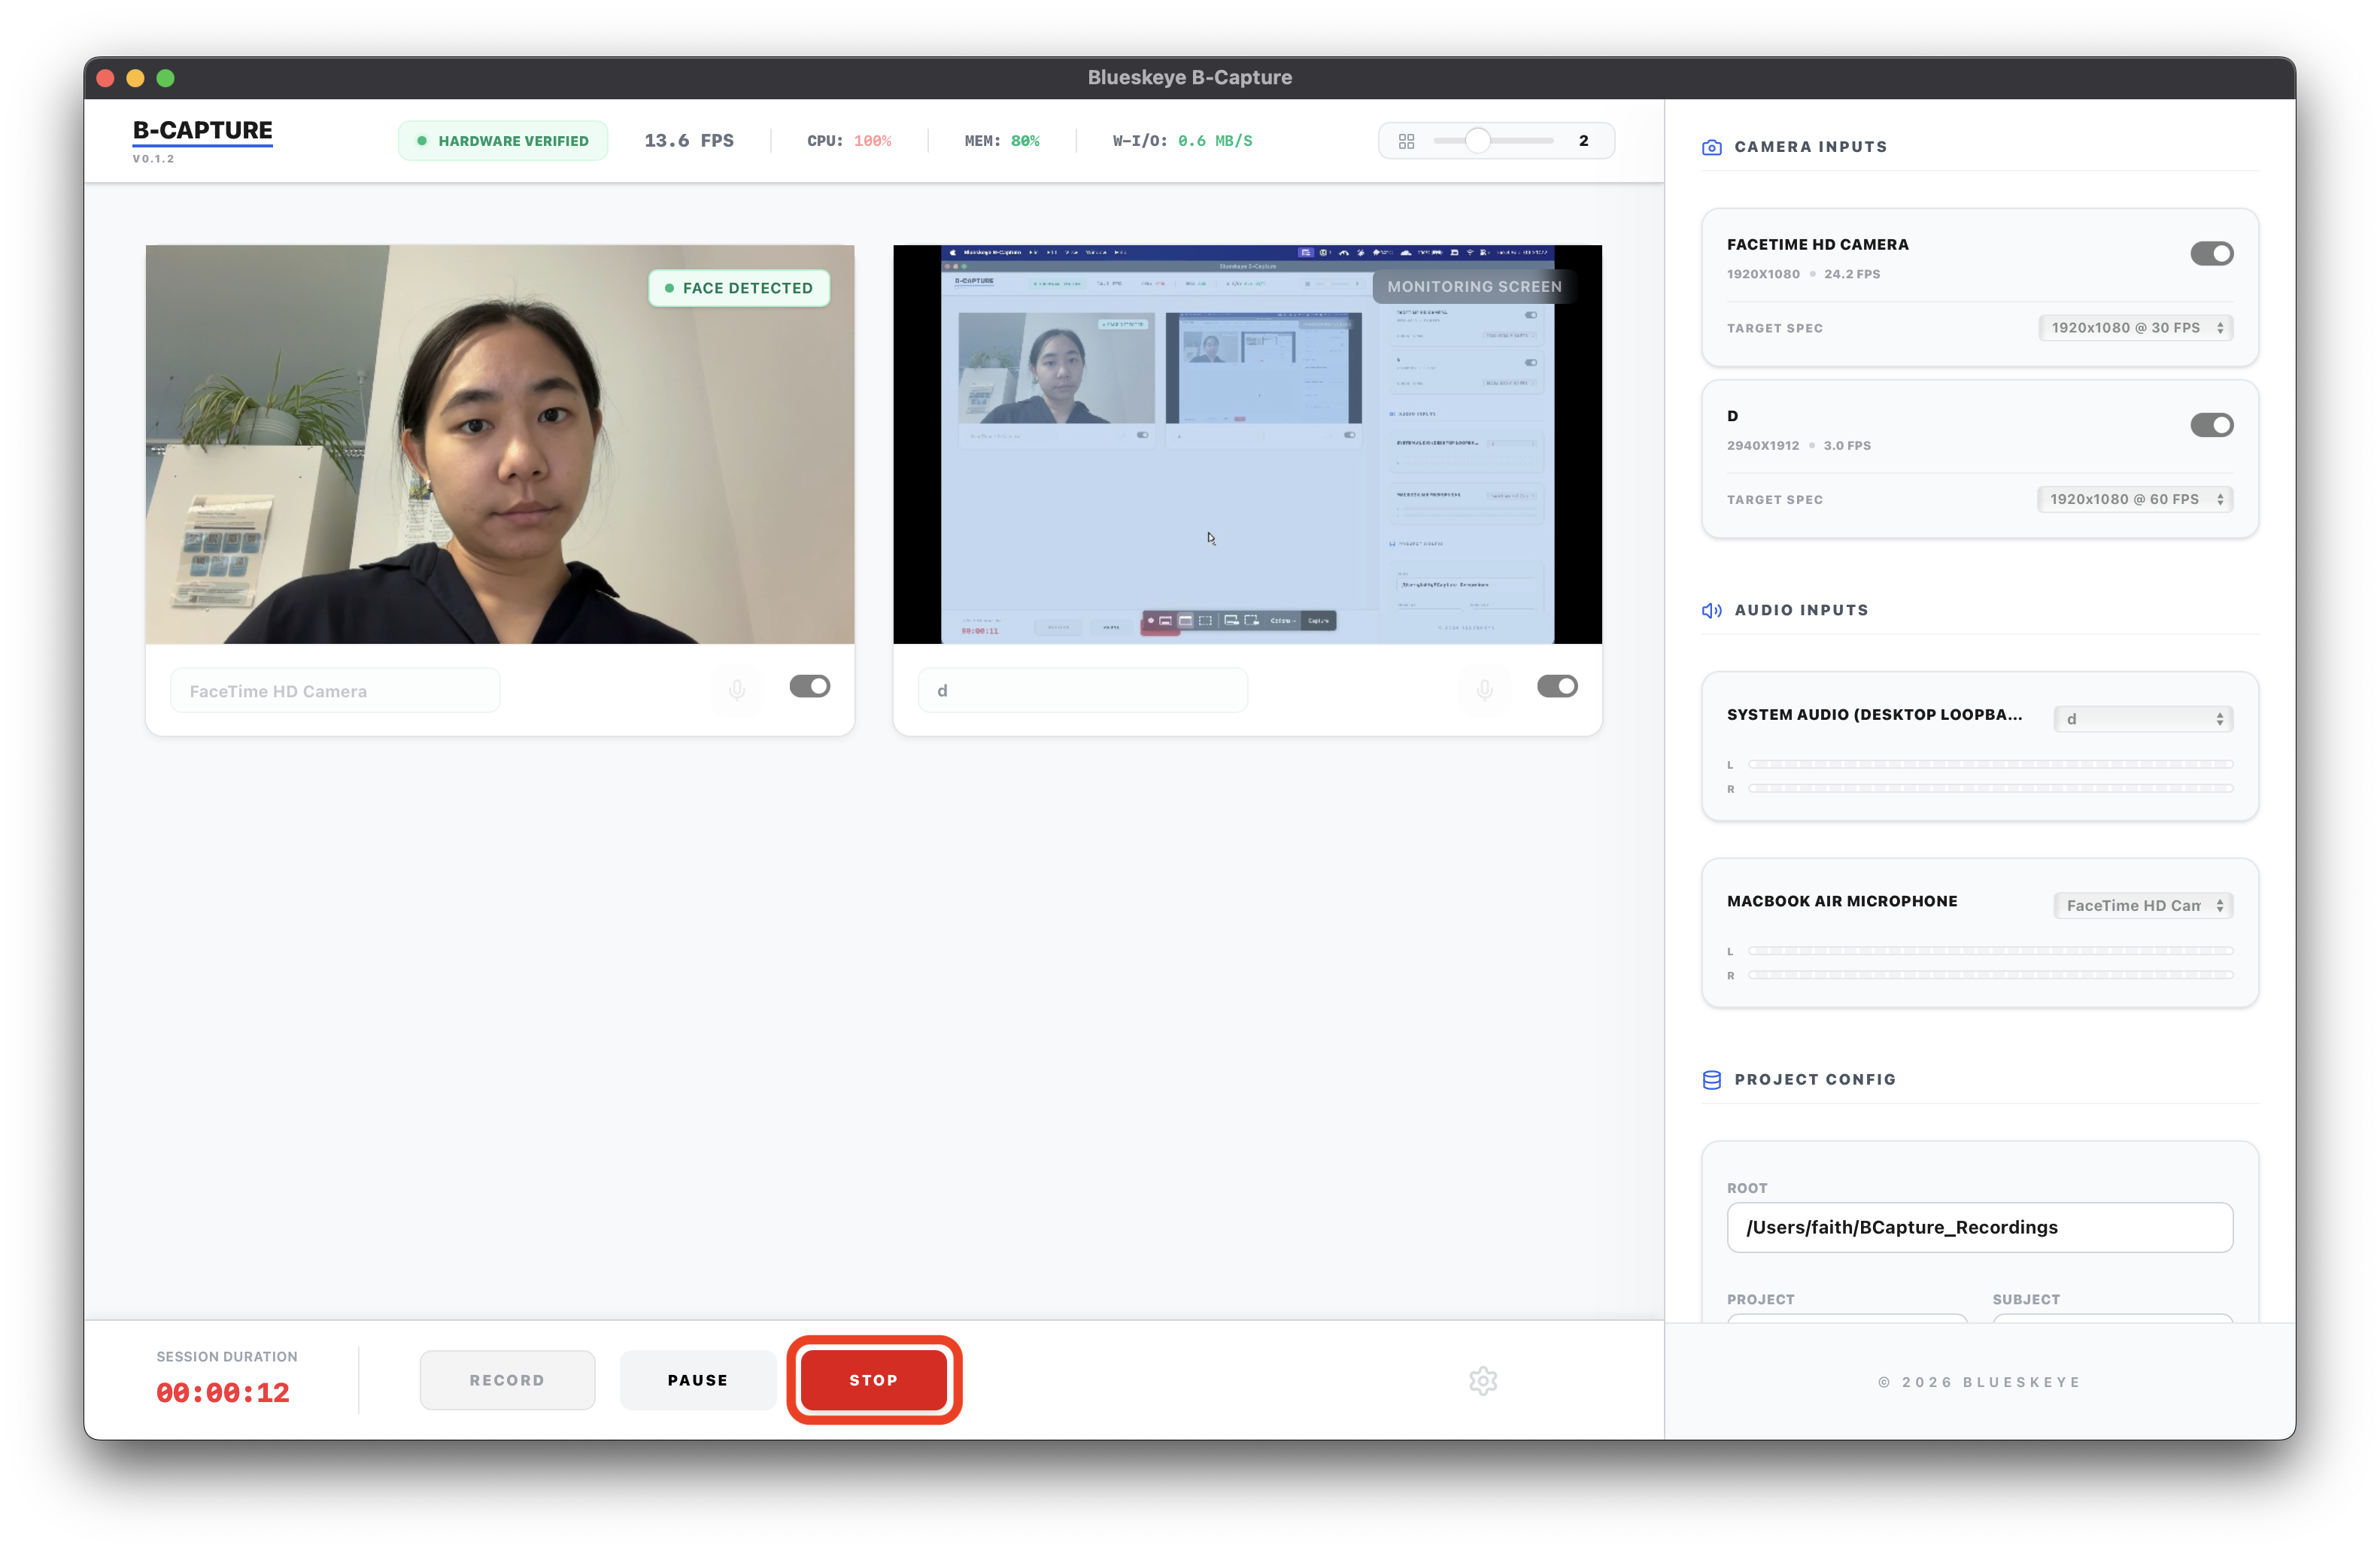
Click on "Stop" to stop the recording session and save the videos.

Settings
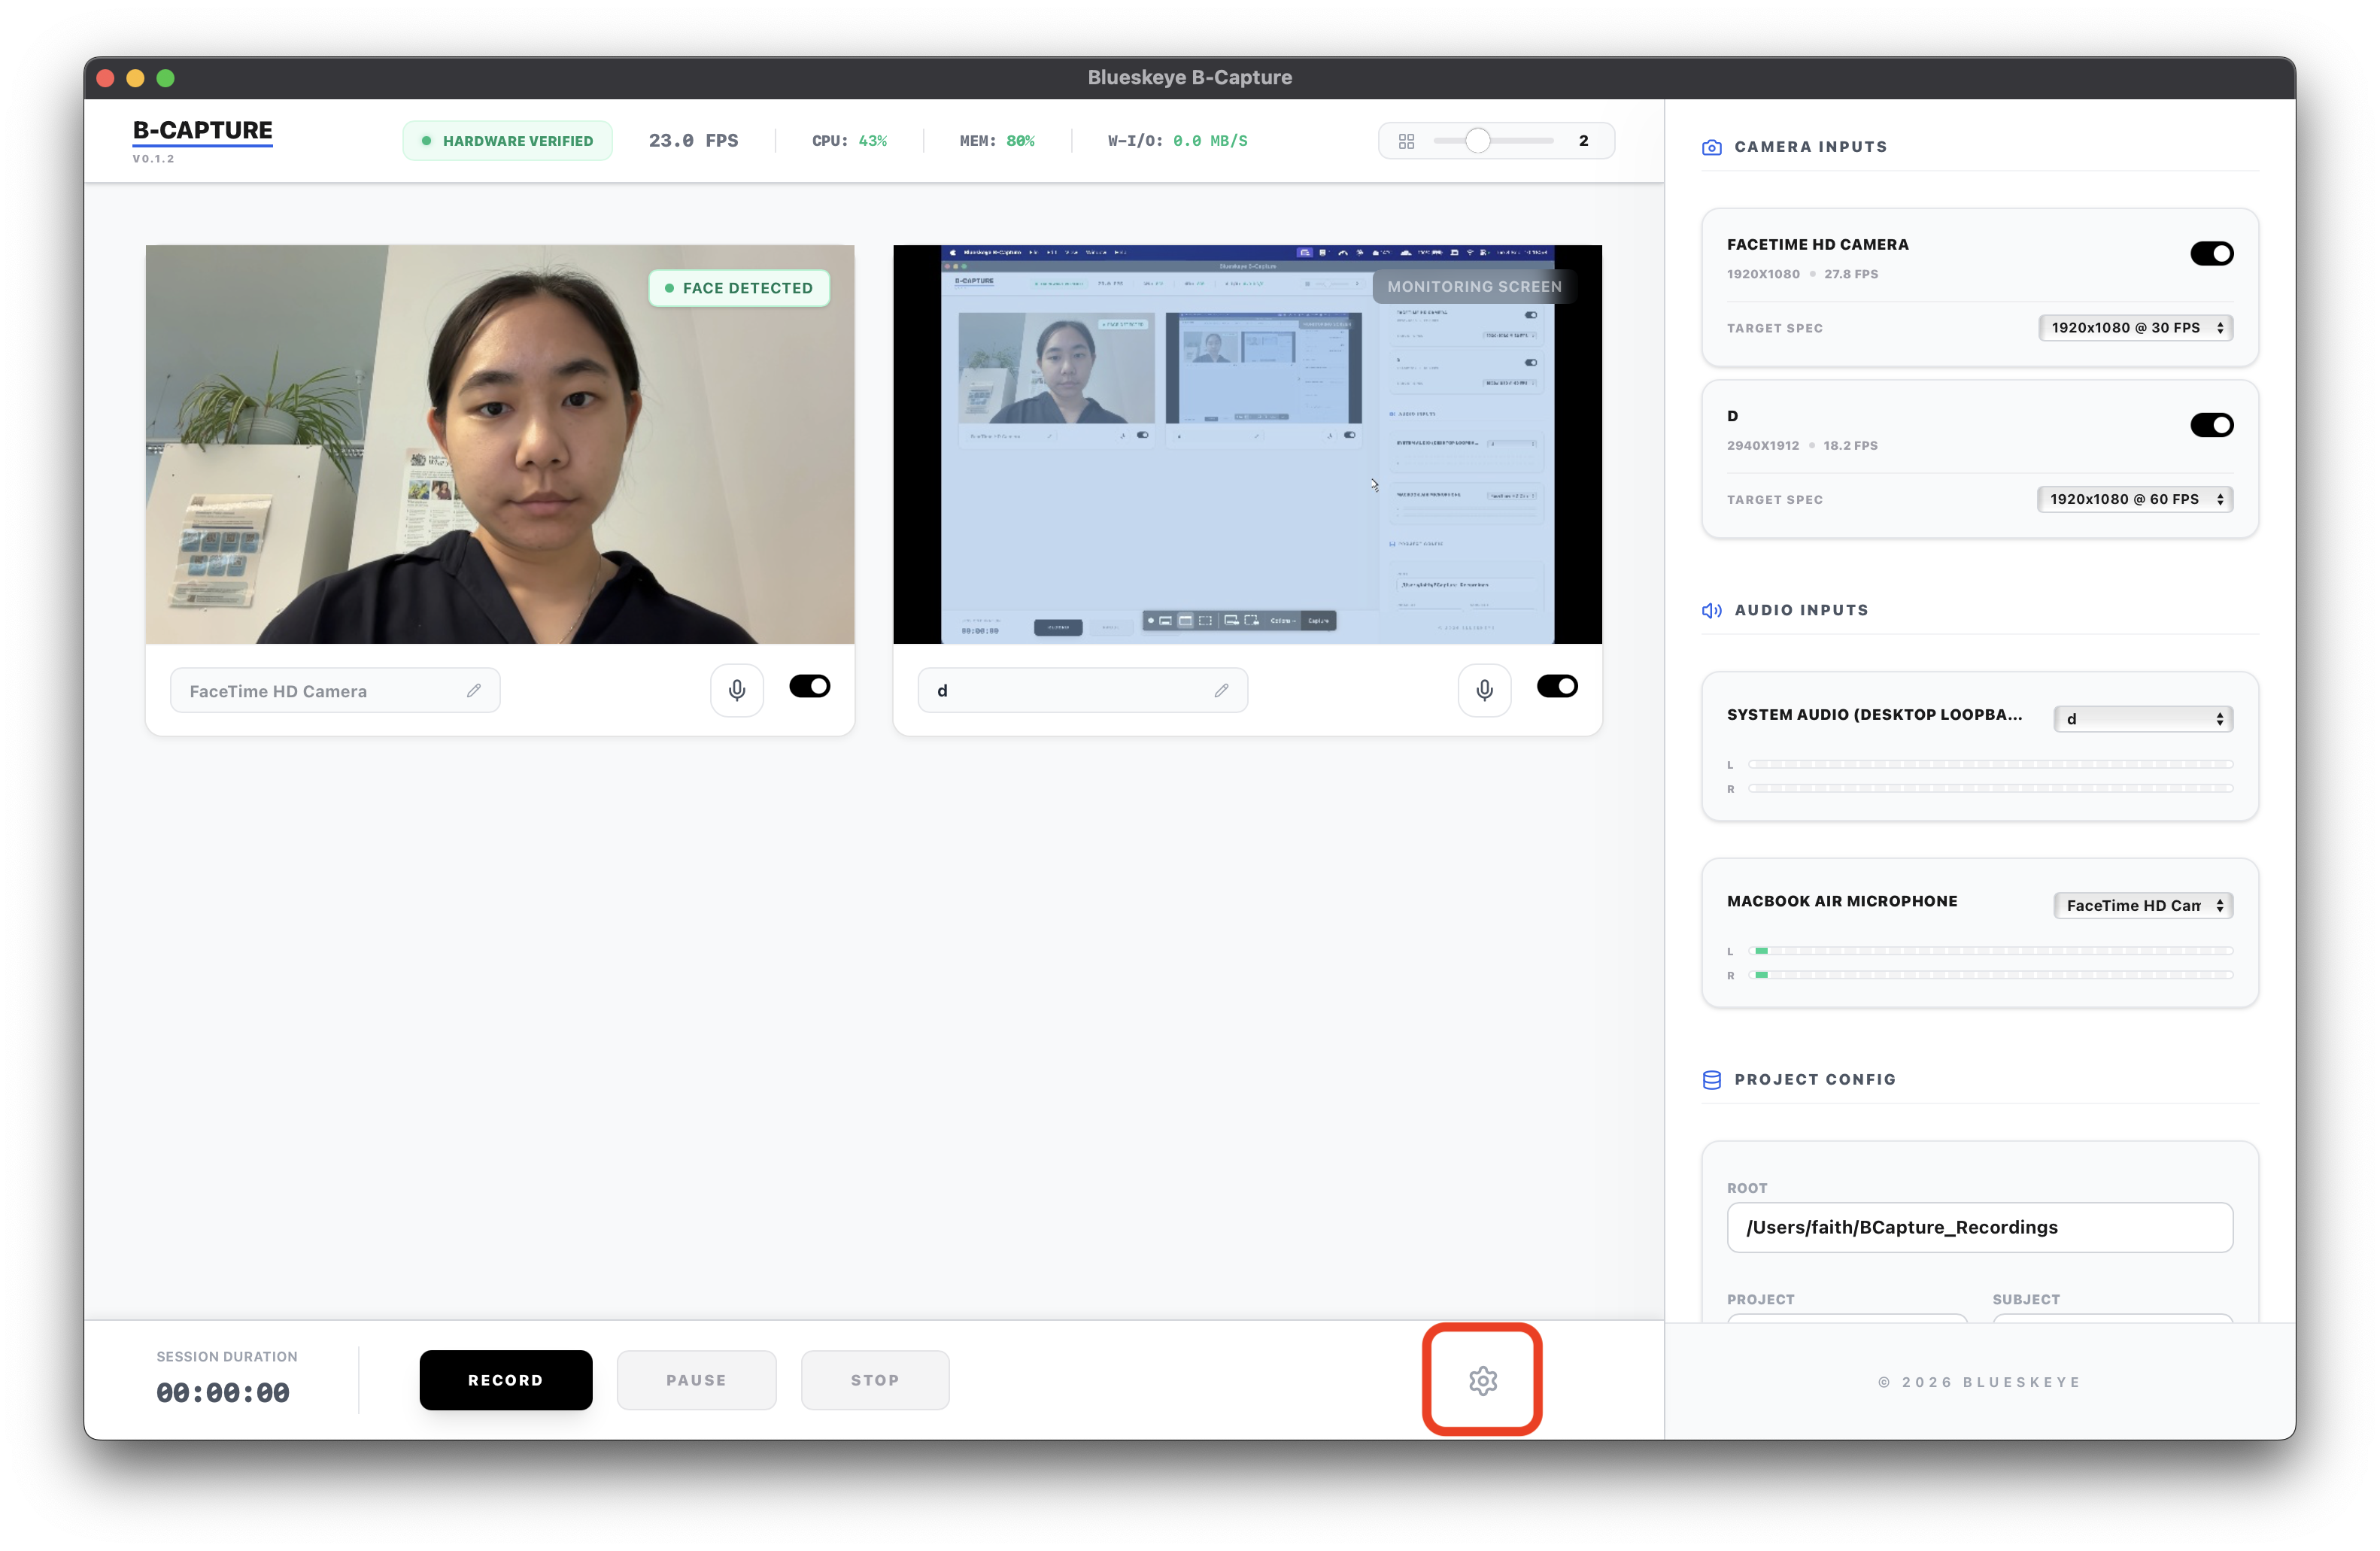
Click on the gear icon to access Settings.